Optimum Pressure-Cook Pro: Water Test
Our old rice cooker (which was also a slow cooker) recently had to be retired, and we decided to replace it with a more fully featured multi-cooker. Will go into more detail about how we came to settle on the Optimum later on, but I want to run through what a Water Test looks like with the Optimum Pressure-Cook Pro.
I would have done the test in any case, but upon unboxing, I found the bowl was pitted and damaged. As the device was brand new, I kicked off the warranty replacement process with vendor Froothie, and confirmed it would be safe to run the water test to ensure the device itself was functioning as expected. Froothie has been pretty responsive and efficient with handling a replacement, and I cannot fault their service so far.
What is a Water Test?
A water test is simply pressure cooking water. It’s a good way to familiarise yourself with a new pressure cooker (stove top or electronic) or to troubleshoot an existing one.
You’ll be able to establish things like how long it takes to come up to pressure, what happens when it comes to pressure, how long it takes and what it does when it releases pressure, and how much evaporation there was. And in the case of the Optimum Pressure-Cook Pro, how loud and verbose the voice guidance may be.
Water Test in the Optimum Pressure-Cook Pro
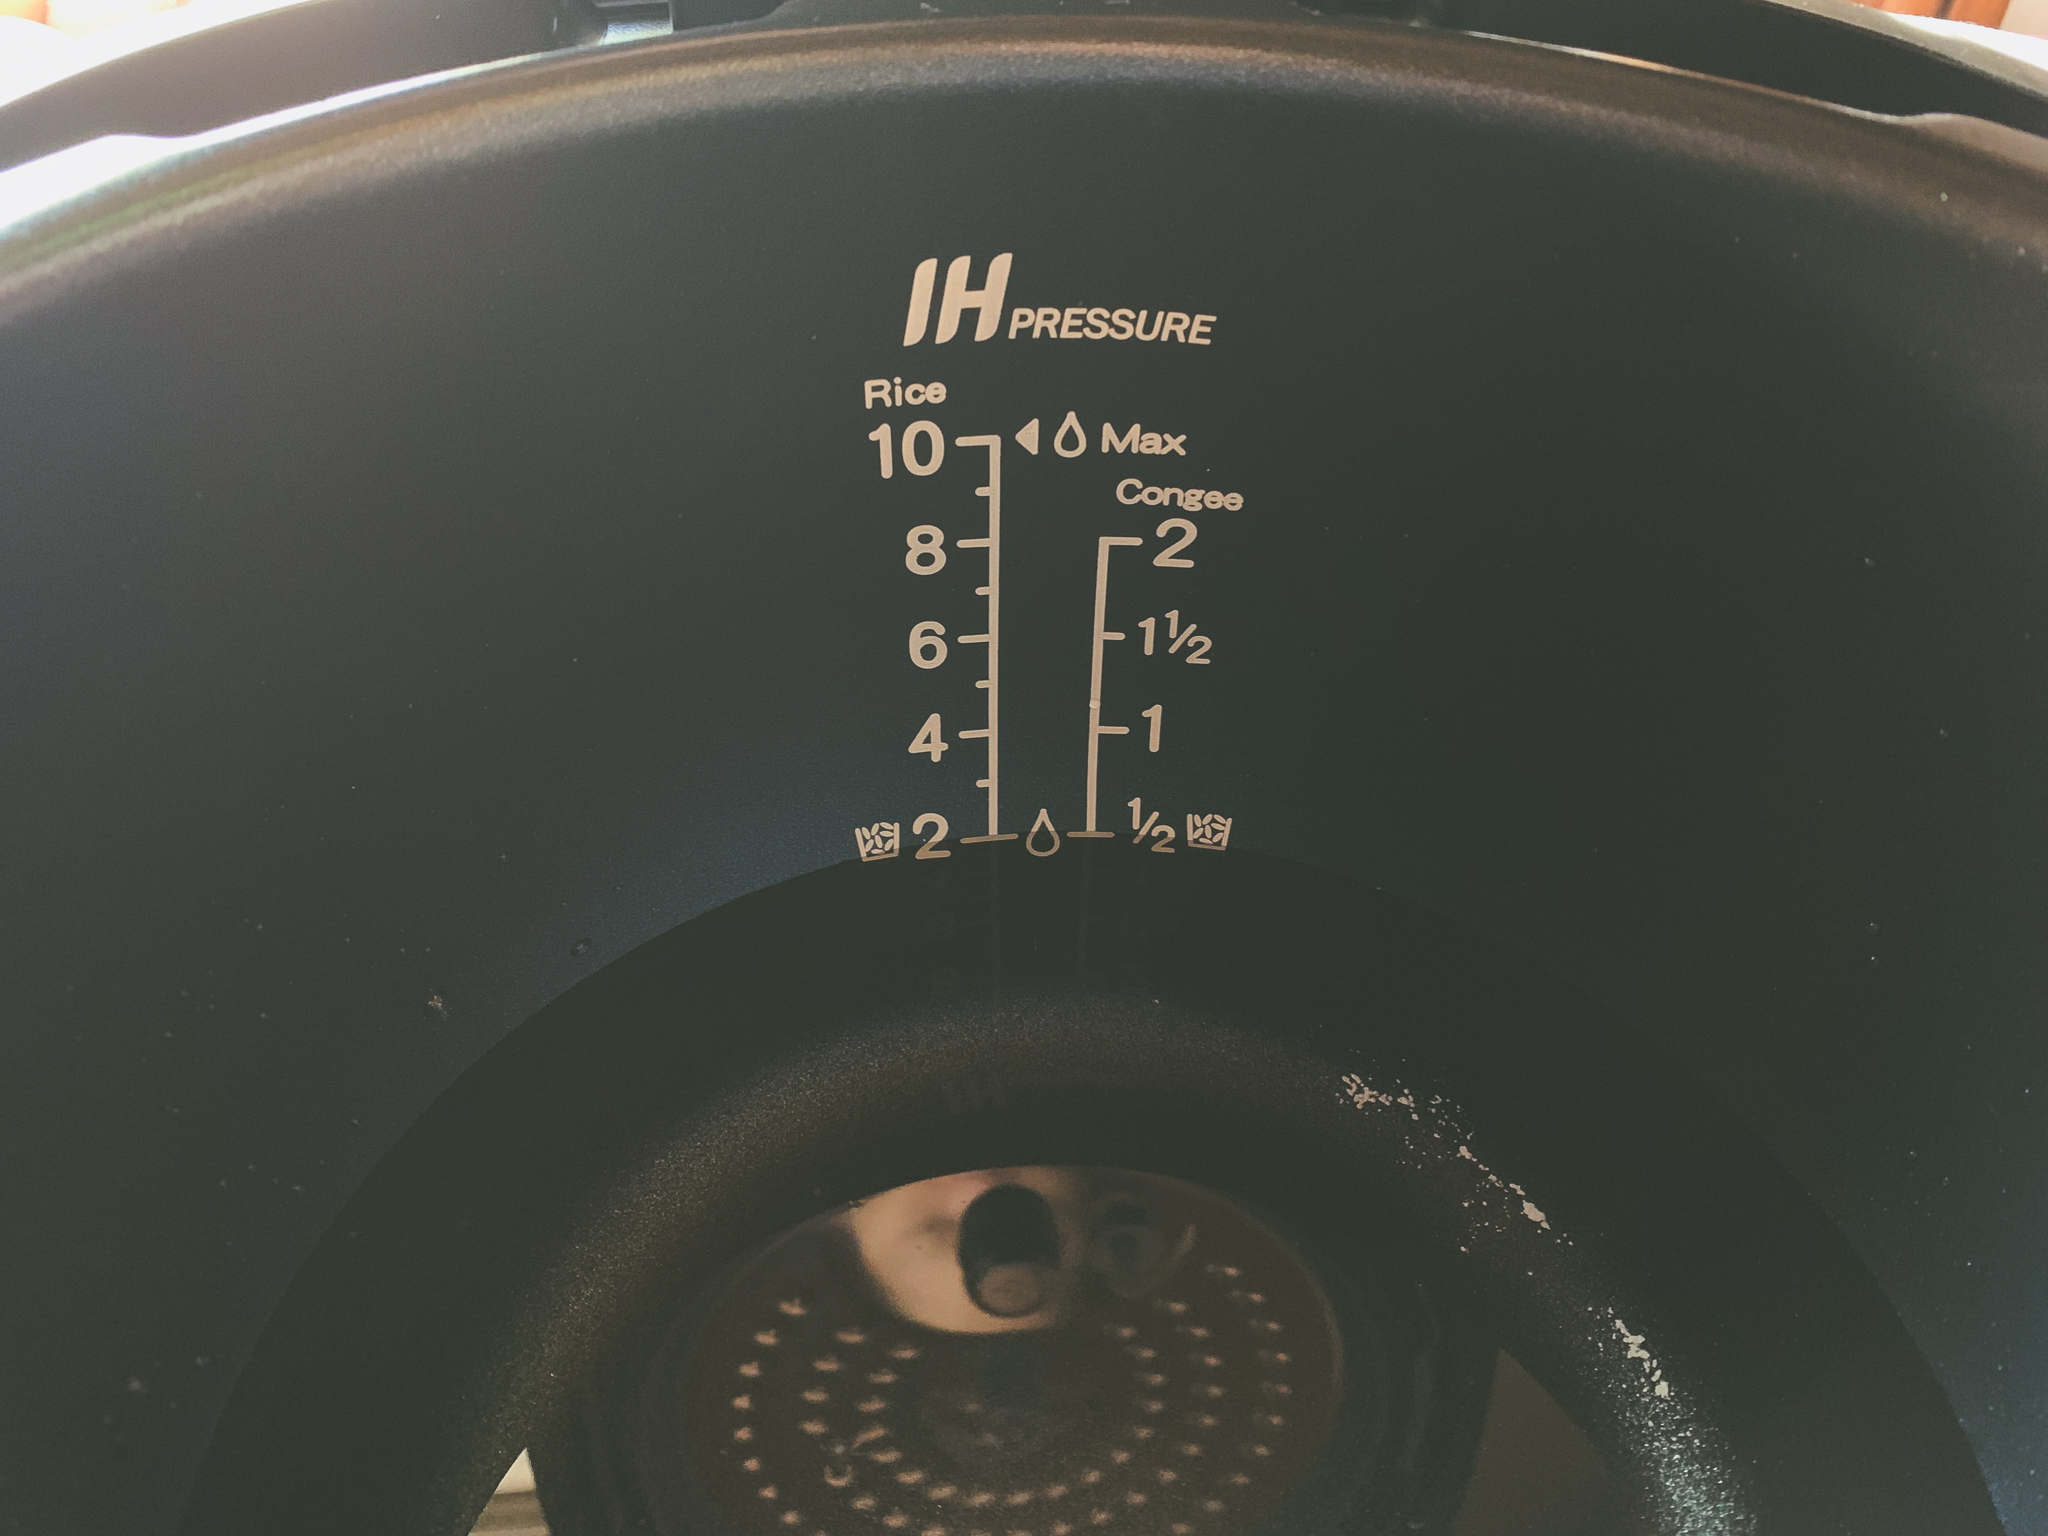
- Put three cups of water in the bowl. This should take you to the minimum line.
- Close the lid and turn the knob to the Close position.
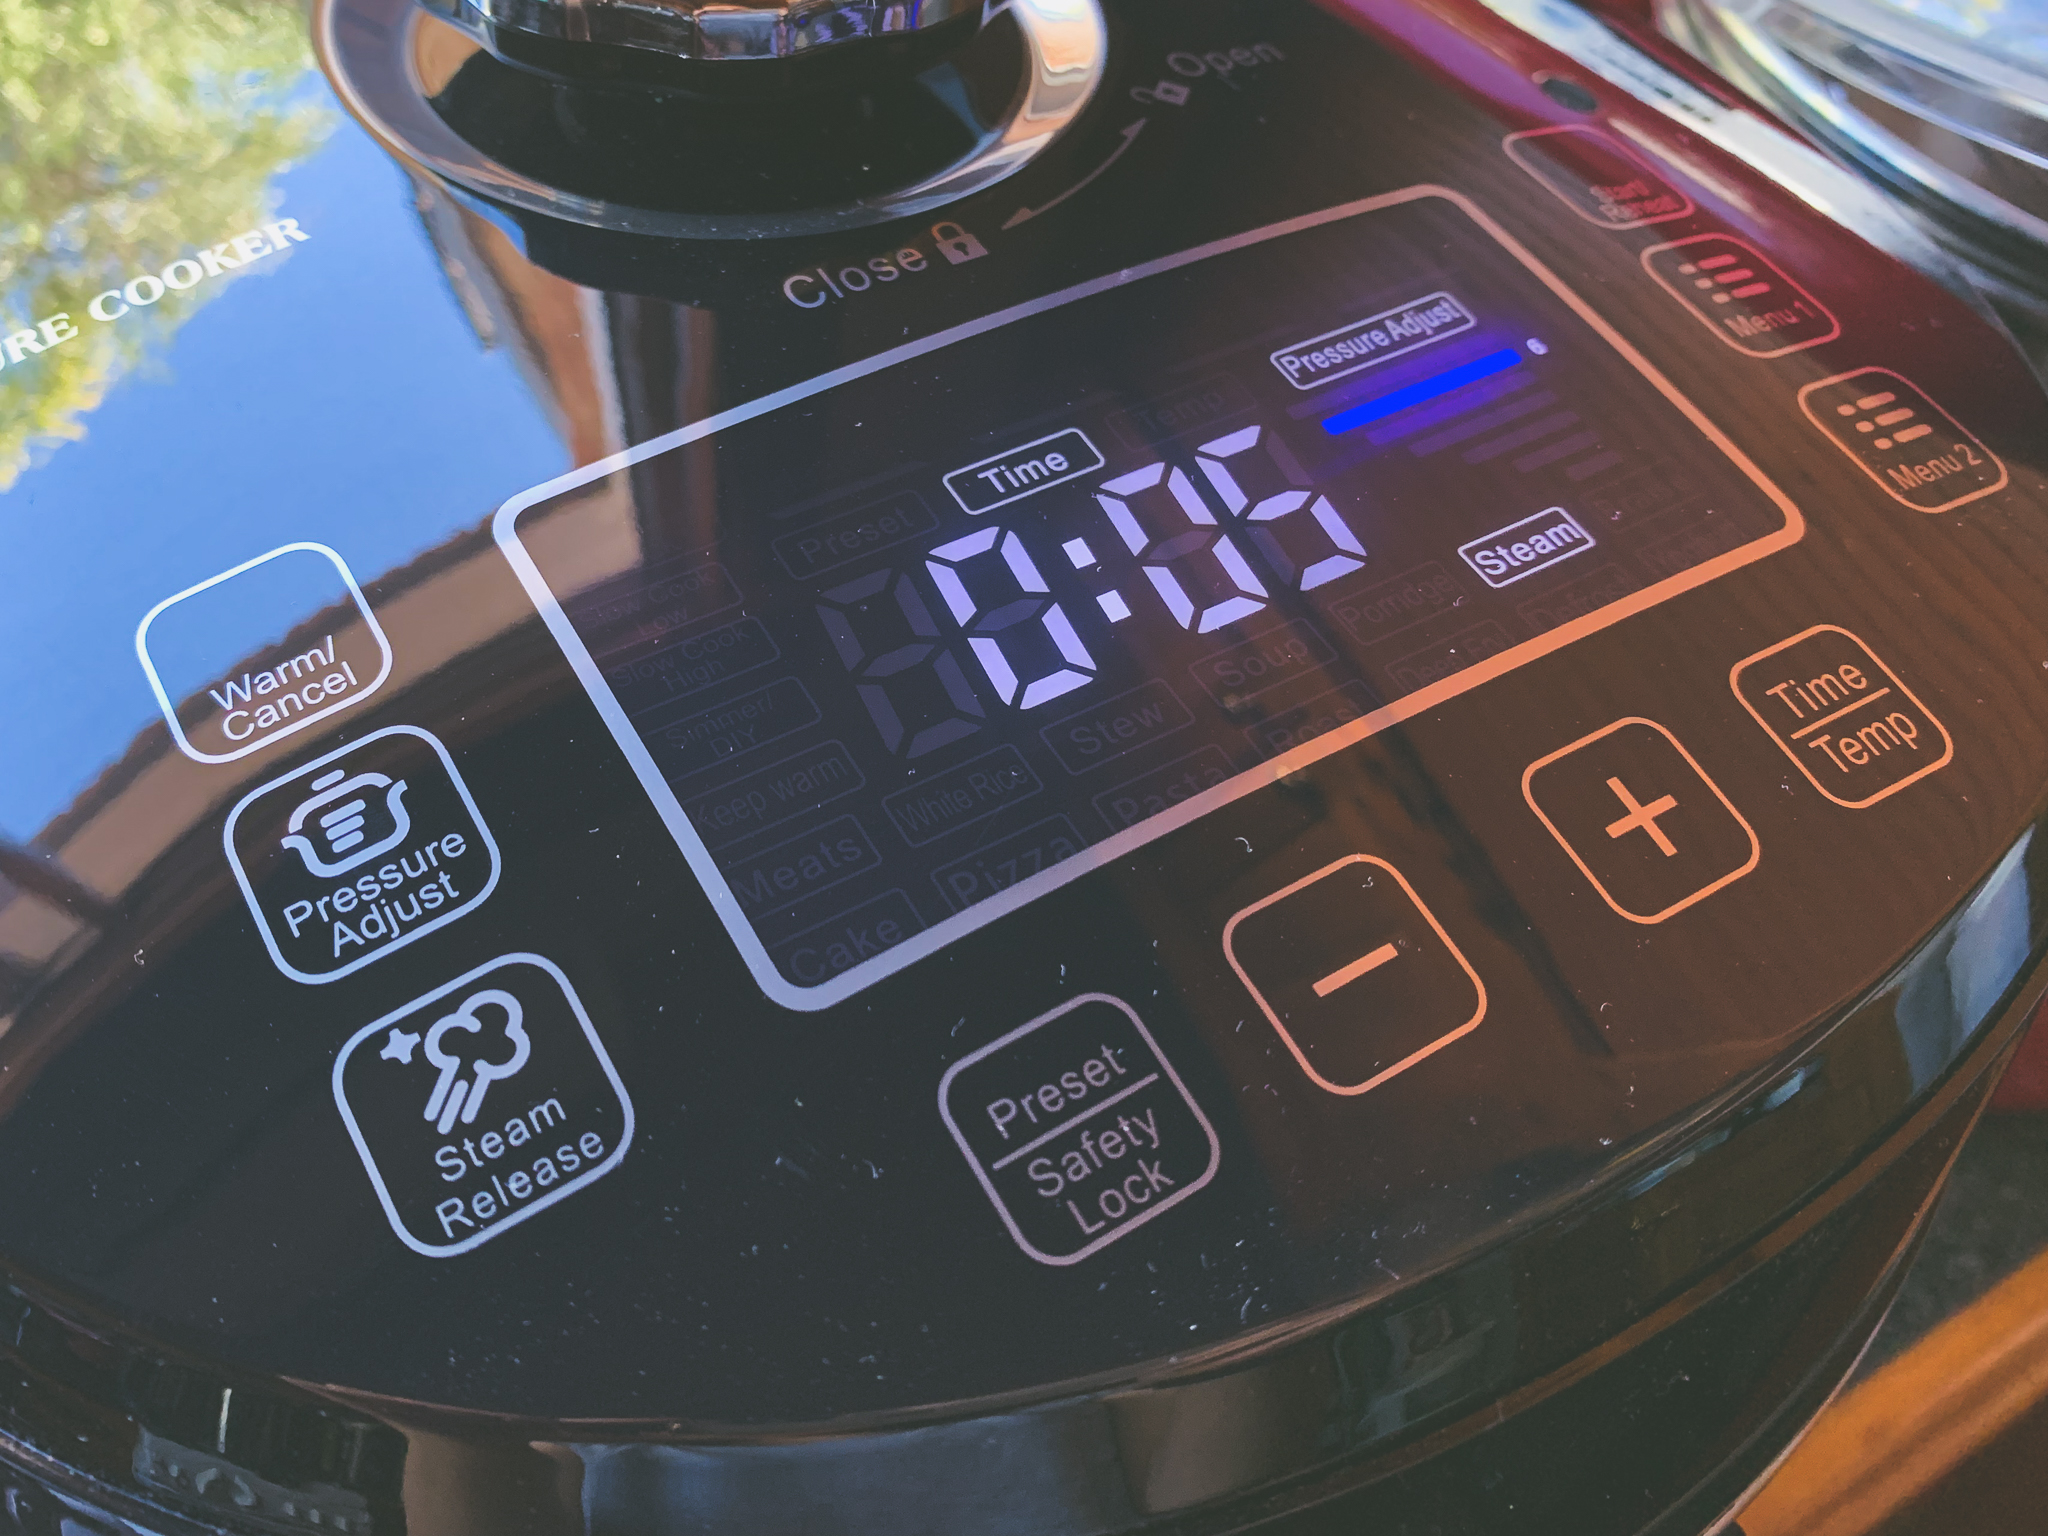
- Press the Menu 2 button until it displays the Steam mode. The Steam mode is the only option that will allow a cook time of 5 minutes.
- Press the Time/Temp button twice, then the minus button to set the time to 5 minutes. The first press allows you to adjust hours, the second to minutes.
- Press the Pressure Adjust button until the blue bars move to 6. I have no logical reasoning for choosing 6, you could use 7. *shrug*
- Press and hold the Start/Reheat button until it begins its process.
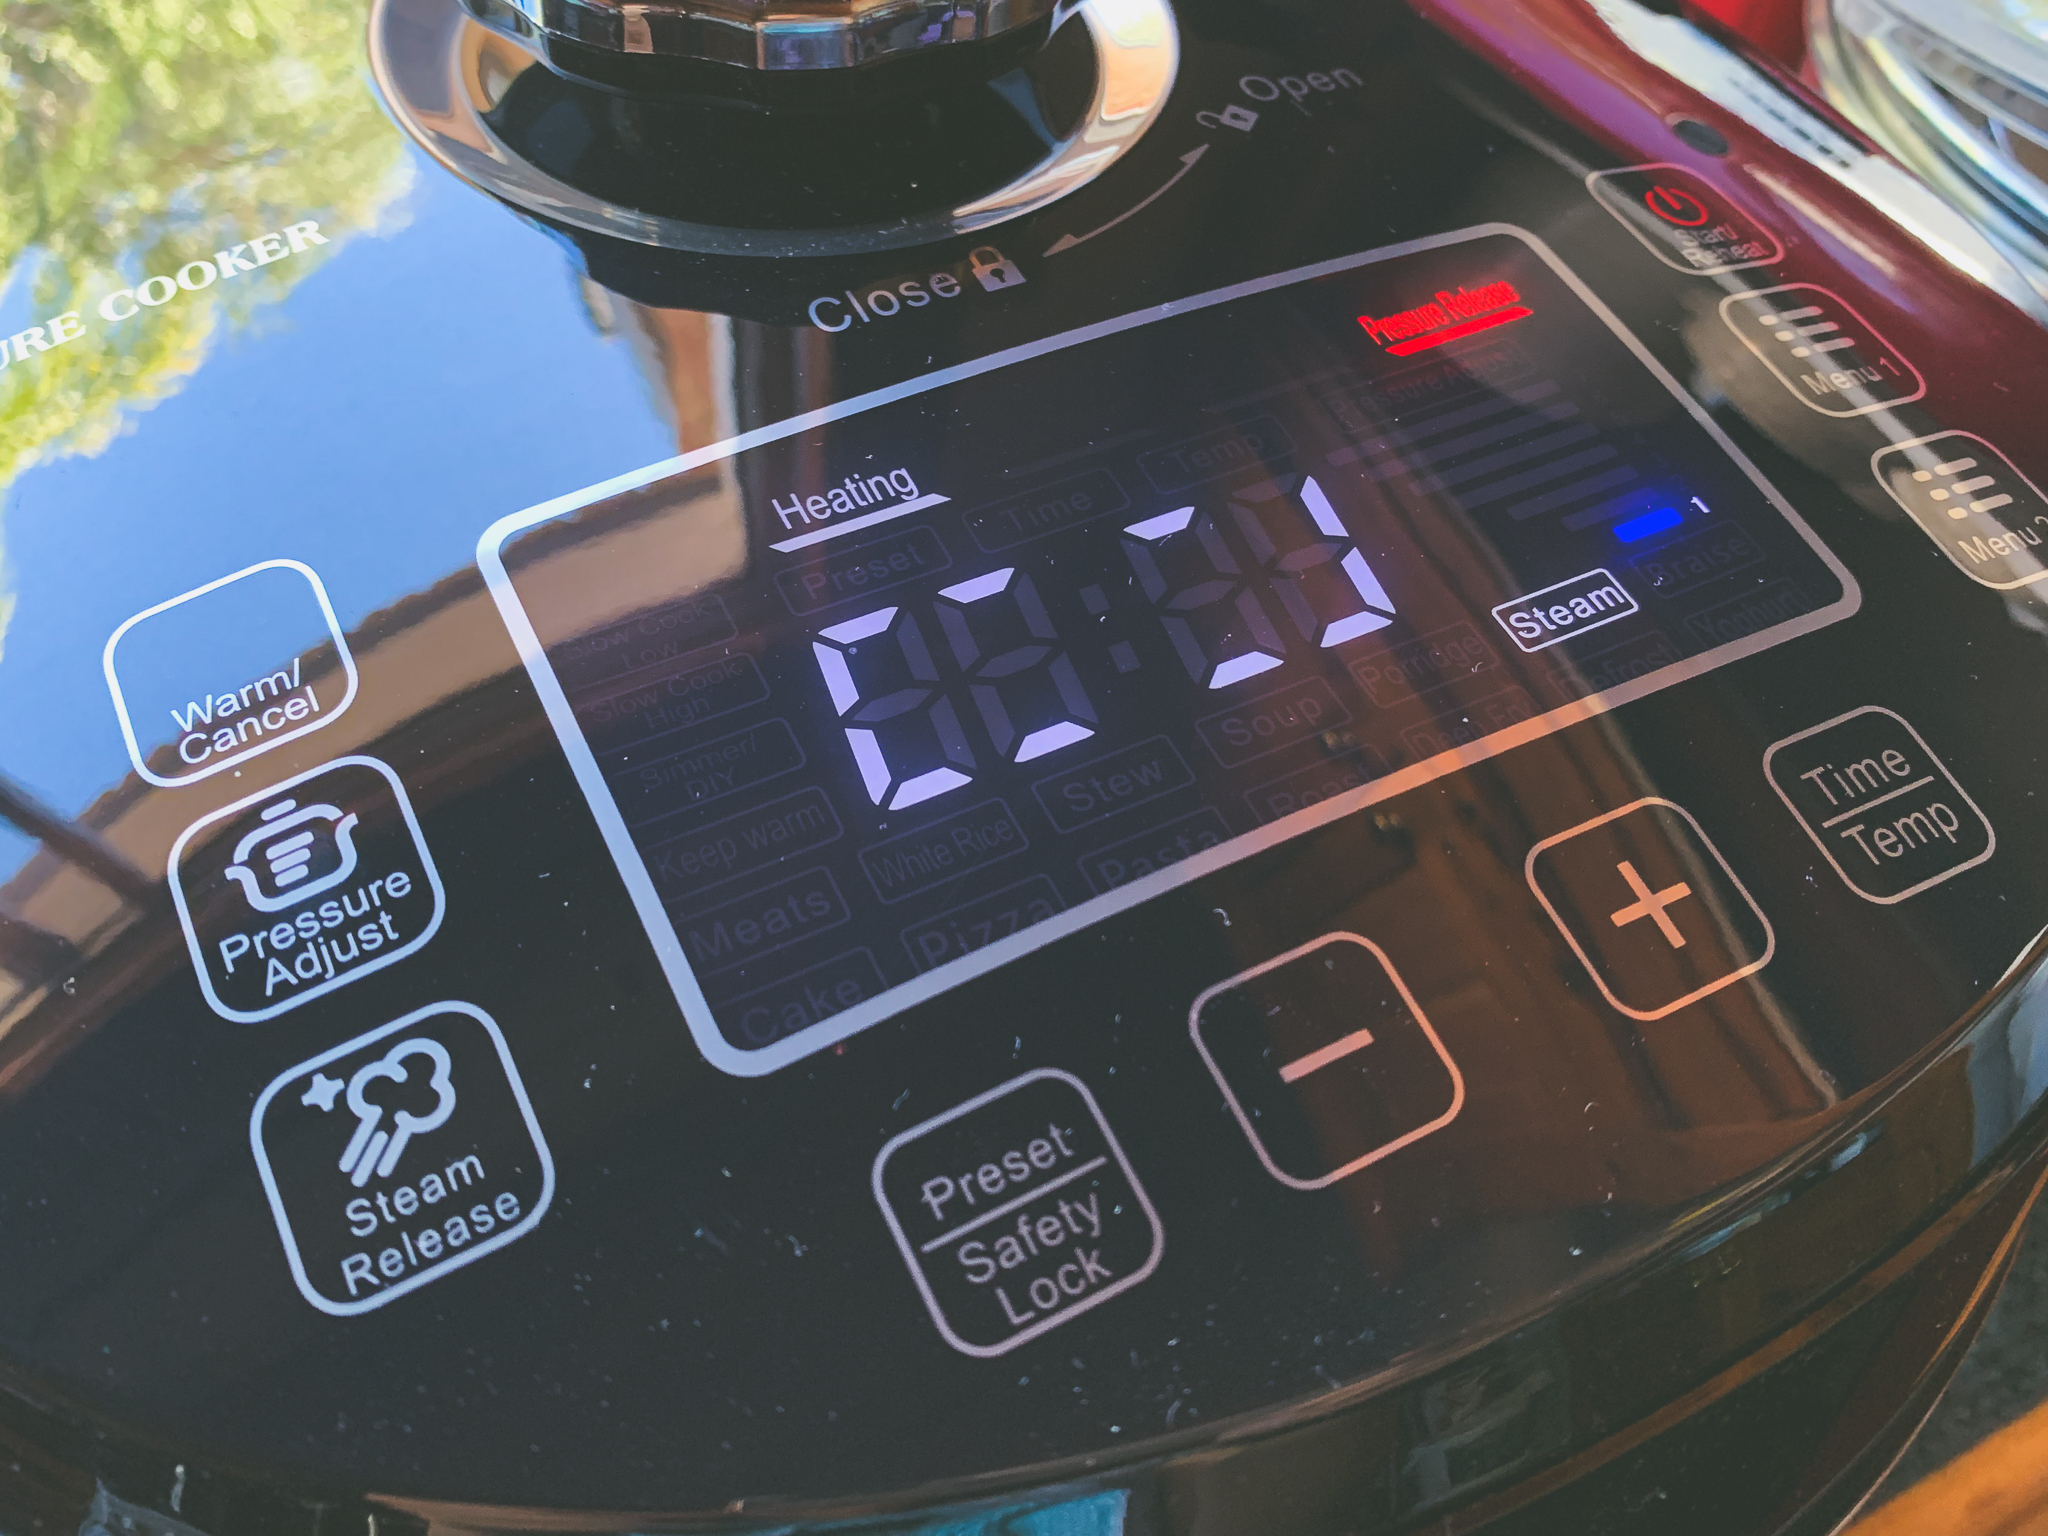
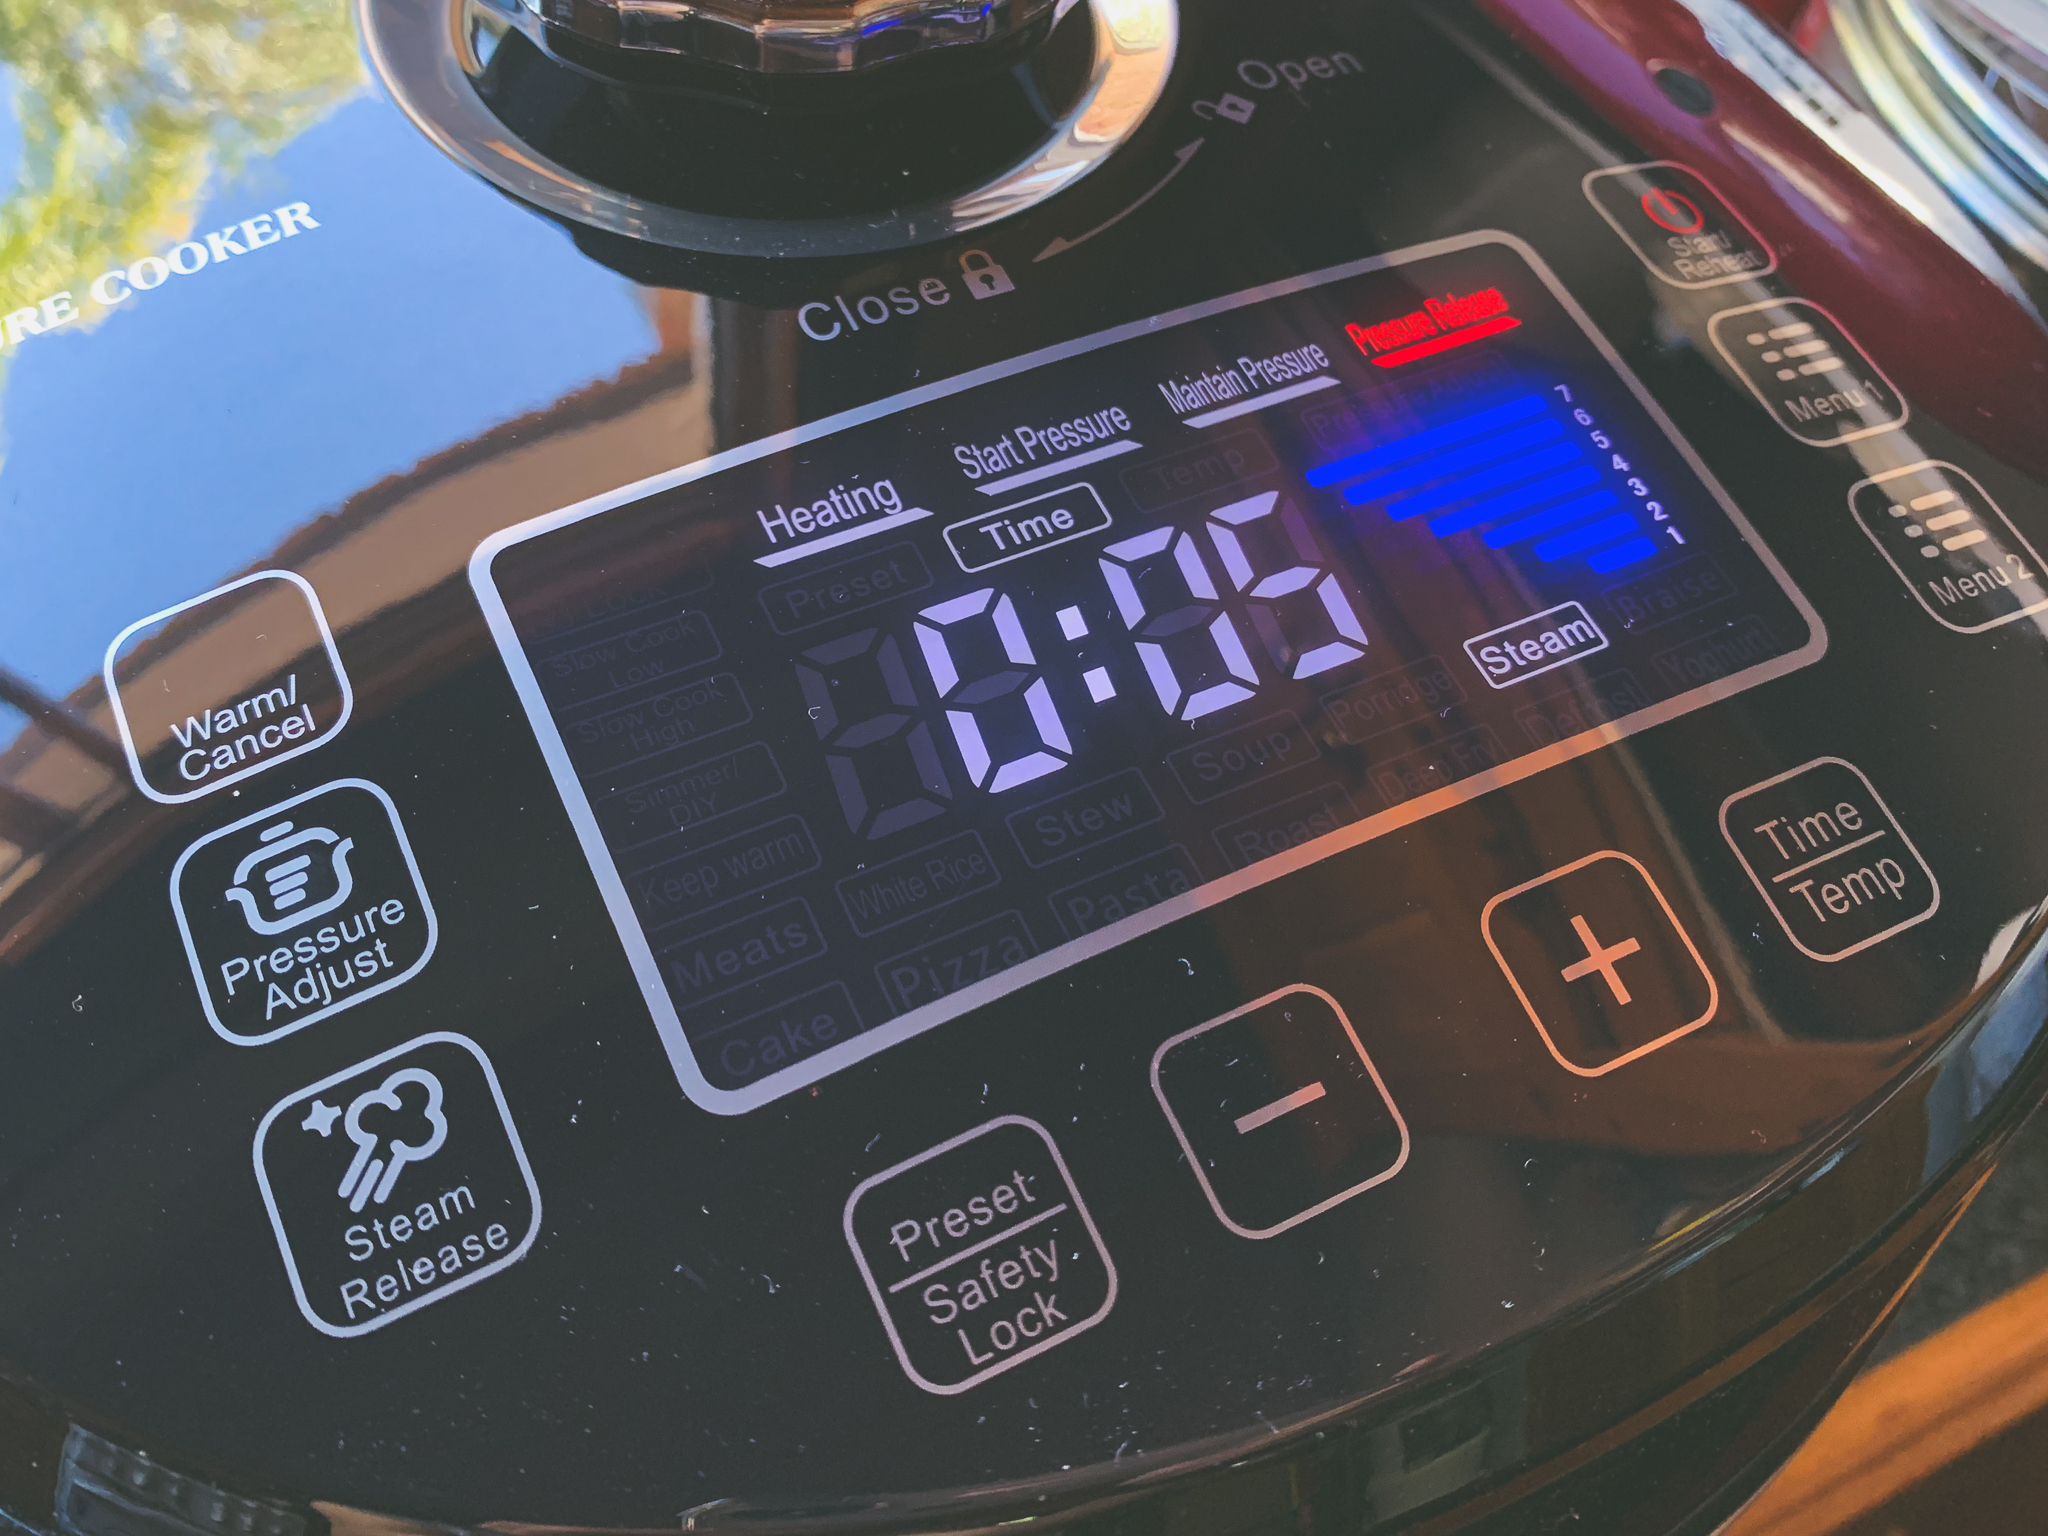
Once the process has started, the display will show an animated box and the “Heating” indicator will display at the top. As pressure starts to build, the red “Pressure Release” indicator will also appear.
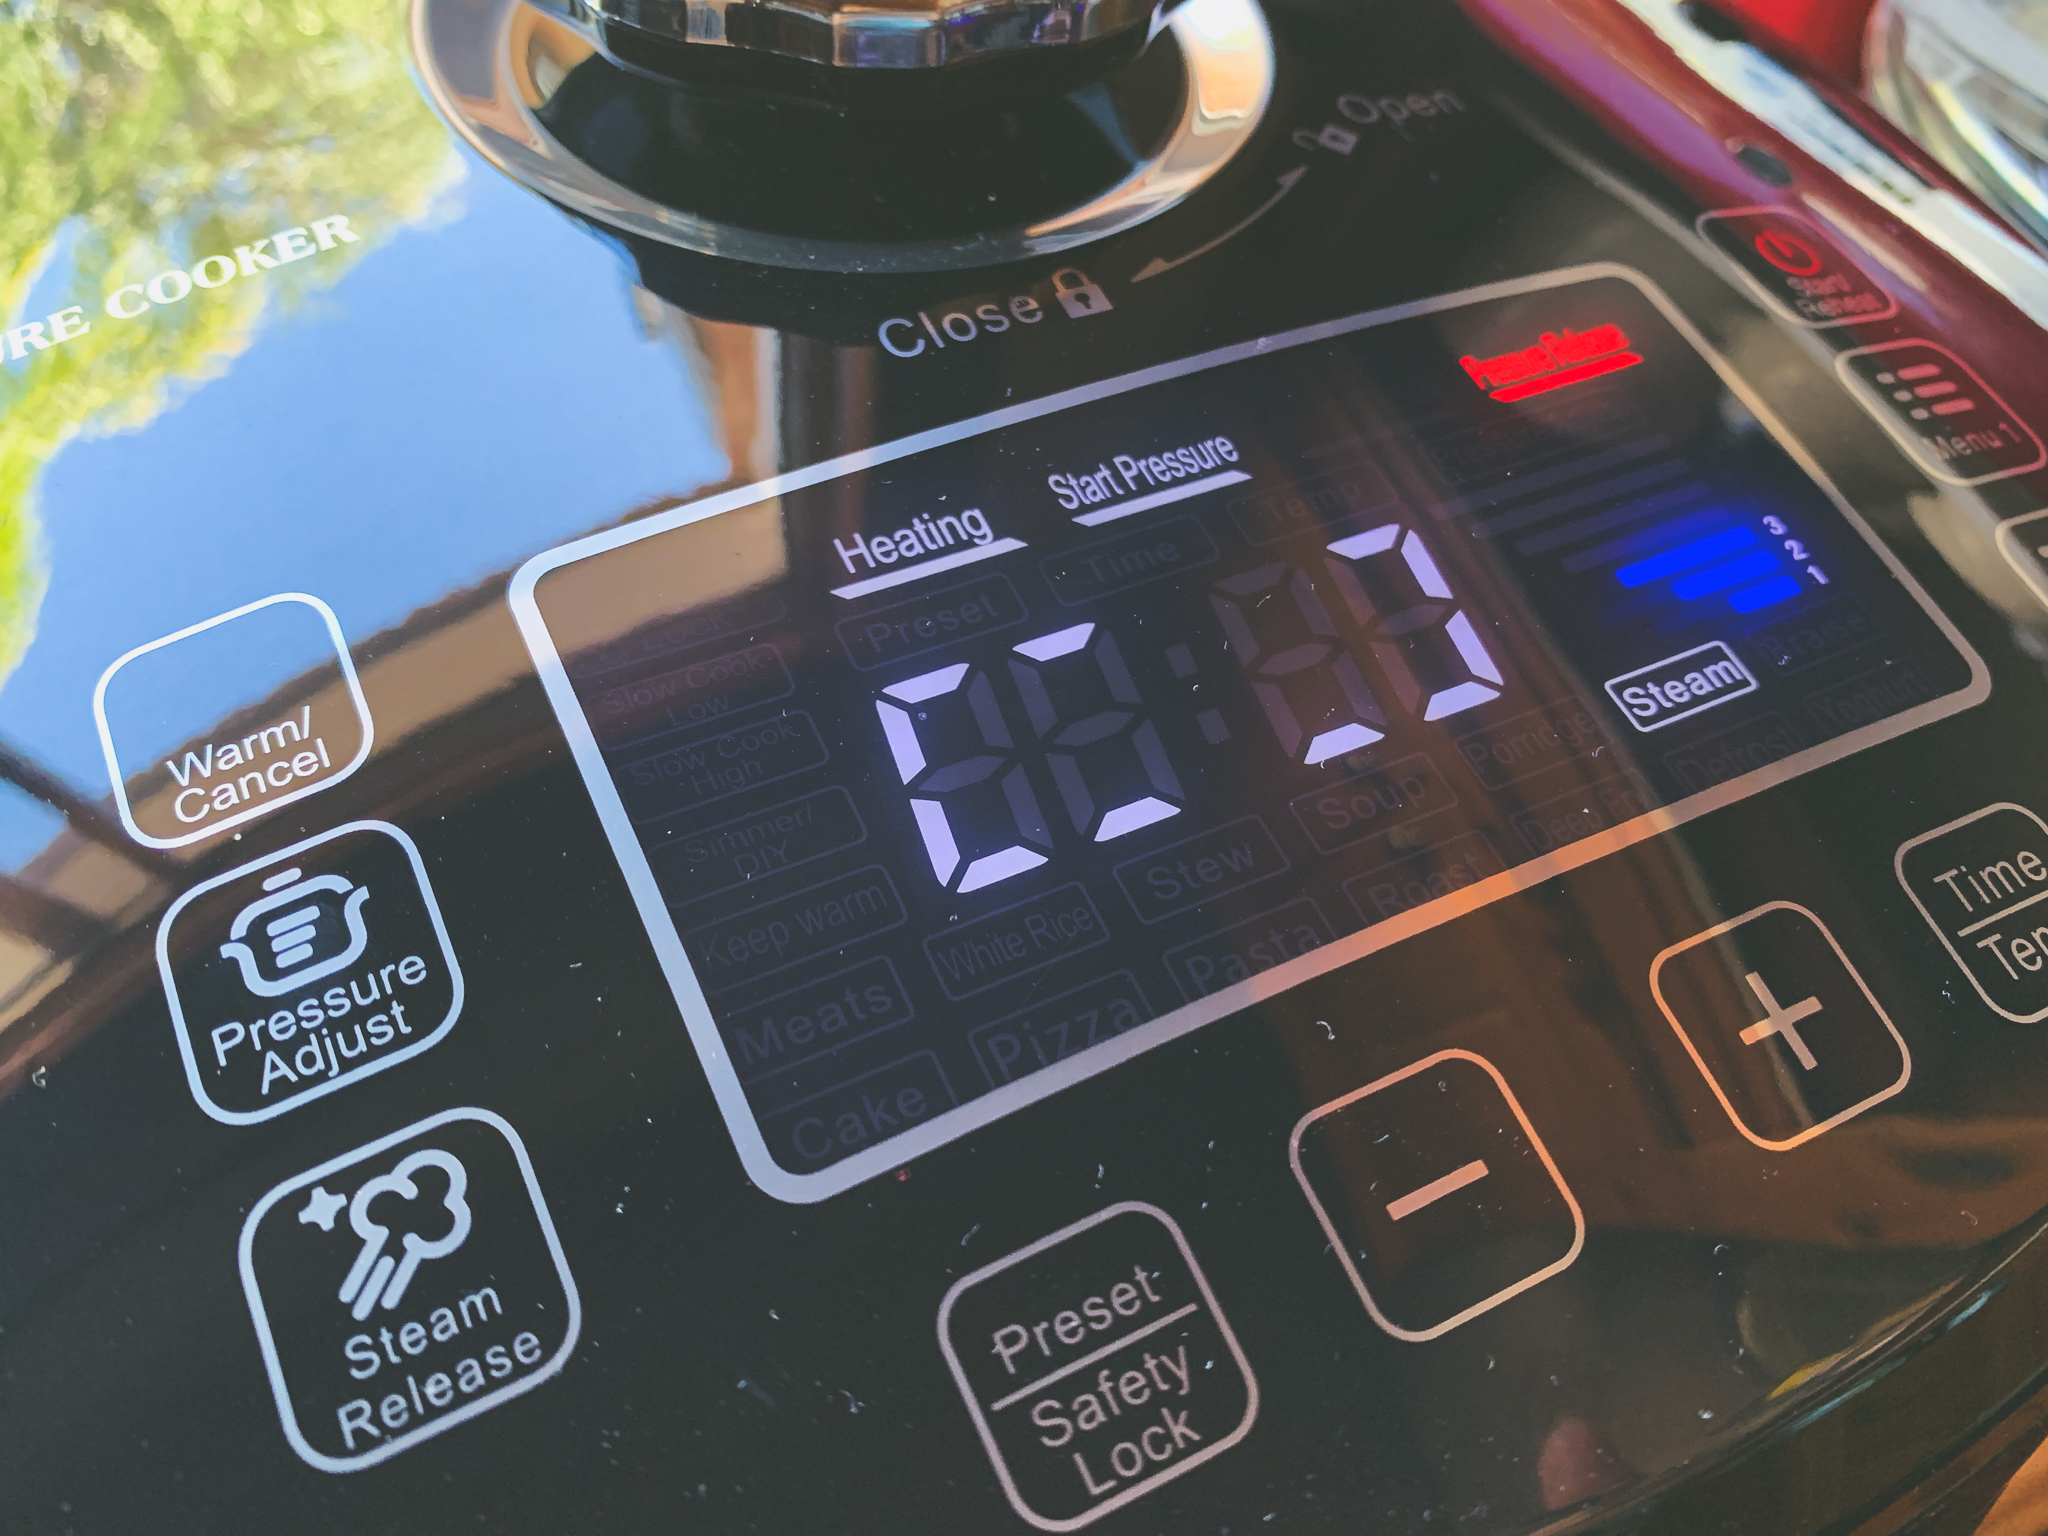
After a few minutes, a short burst of steam will be ejected from the vent, and the “Start Pressure” indicator will light up. As pressure builds, the blue pressure bars will light up one by one as pressure increases.
Once your chosen pressure has been reached (took about 7 minutes), the 5-minute timer will start. The “Maintain Pressure” indicator will also display. During the cooking phase, the pressure bars toggled between 5-7.
At the end of the 5 minutes, the “Keep Warm” indicator lit up, and the others went off, leaving only the “Pressure Release” indicator. The pressure started being released from the vent at short intervals taking between 2-3 minutes, with the blue bars showing the decrease in pressure.
Note: This appears to be neither 'quick release' nor is it 'natural release' as you would find in regular pressure cookers. The staggered release seems to be a compromise of the two, allowing it to be quicker and safer.
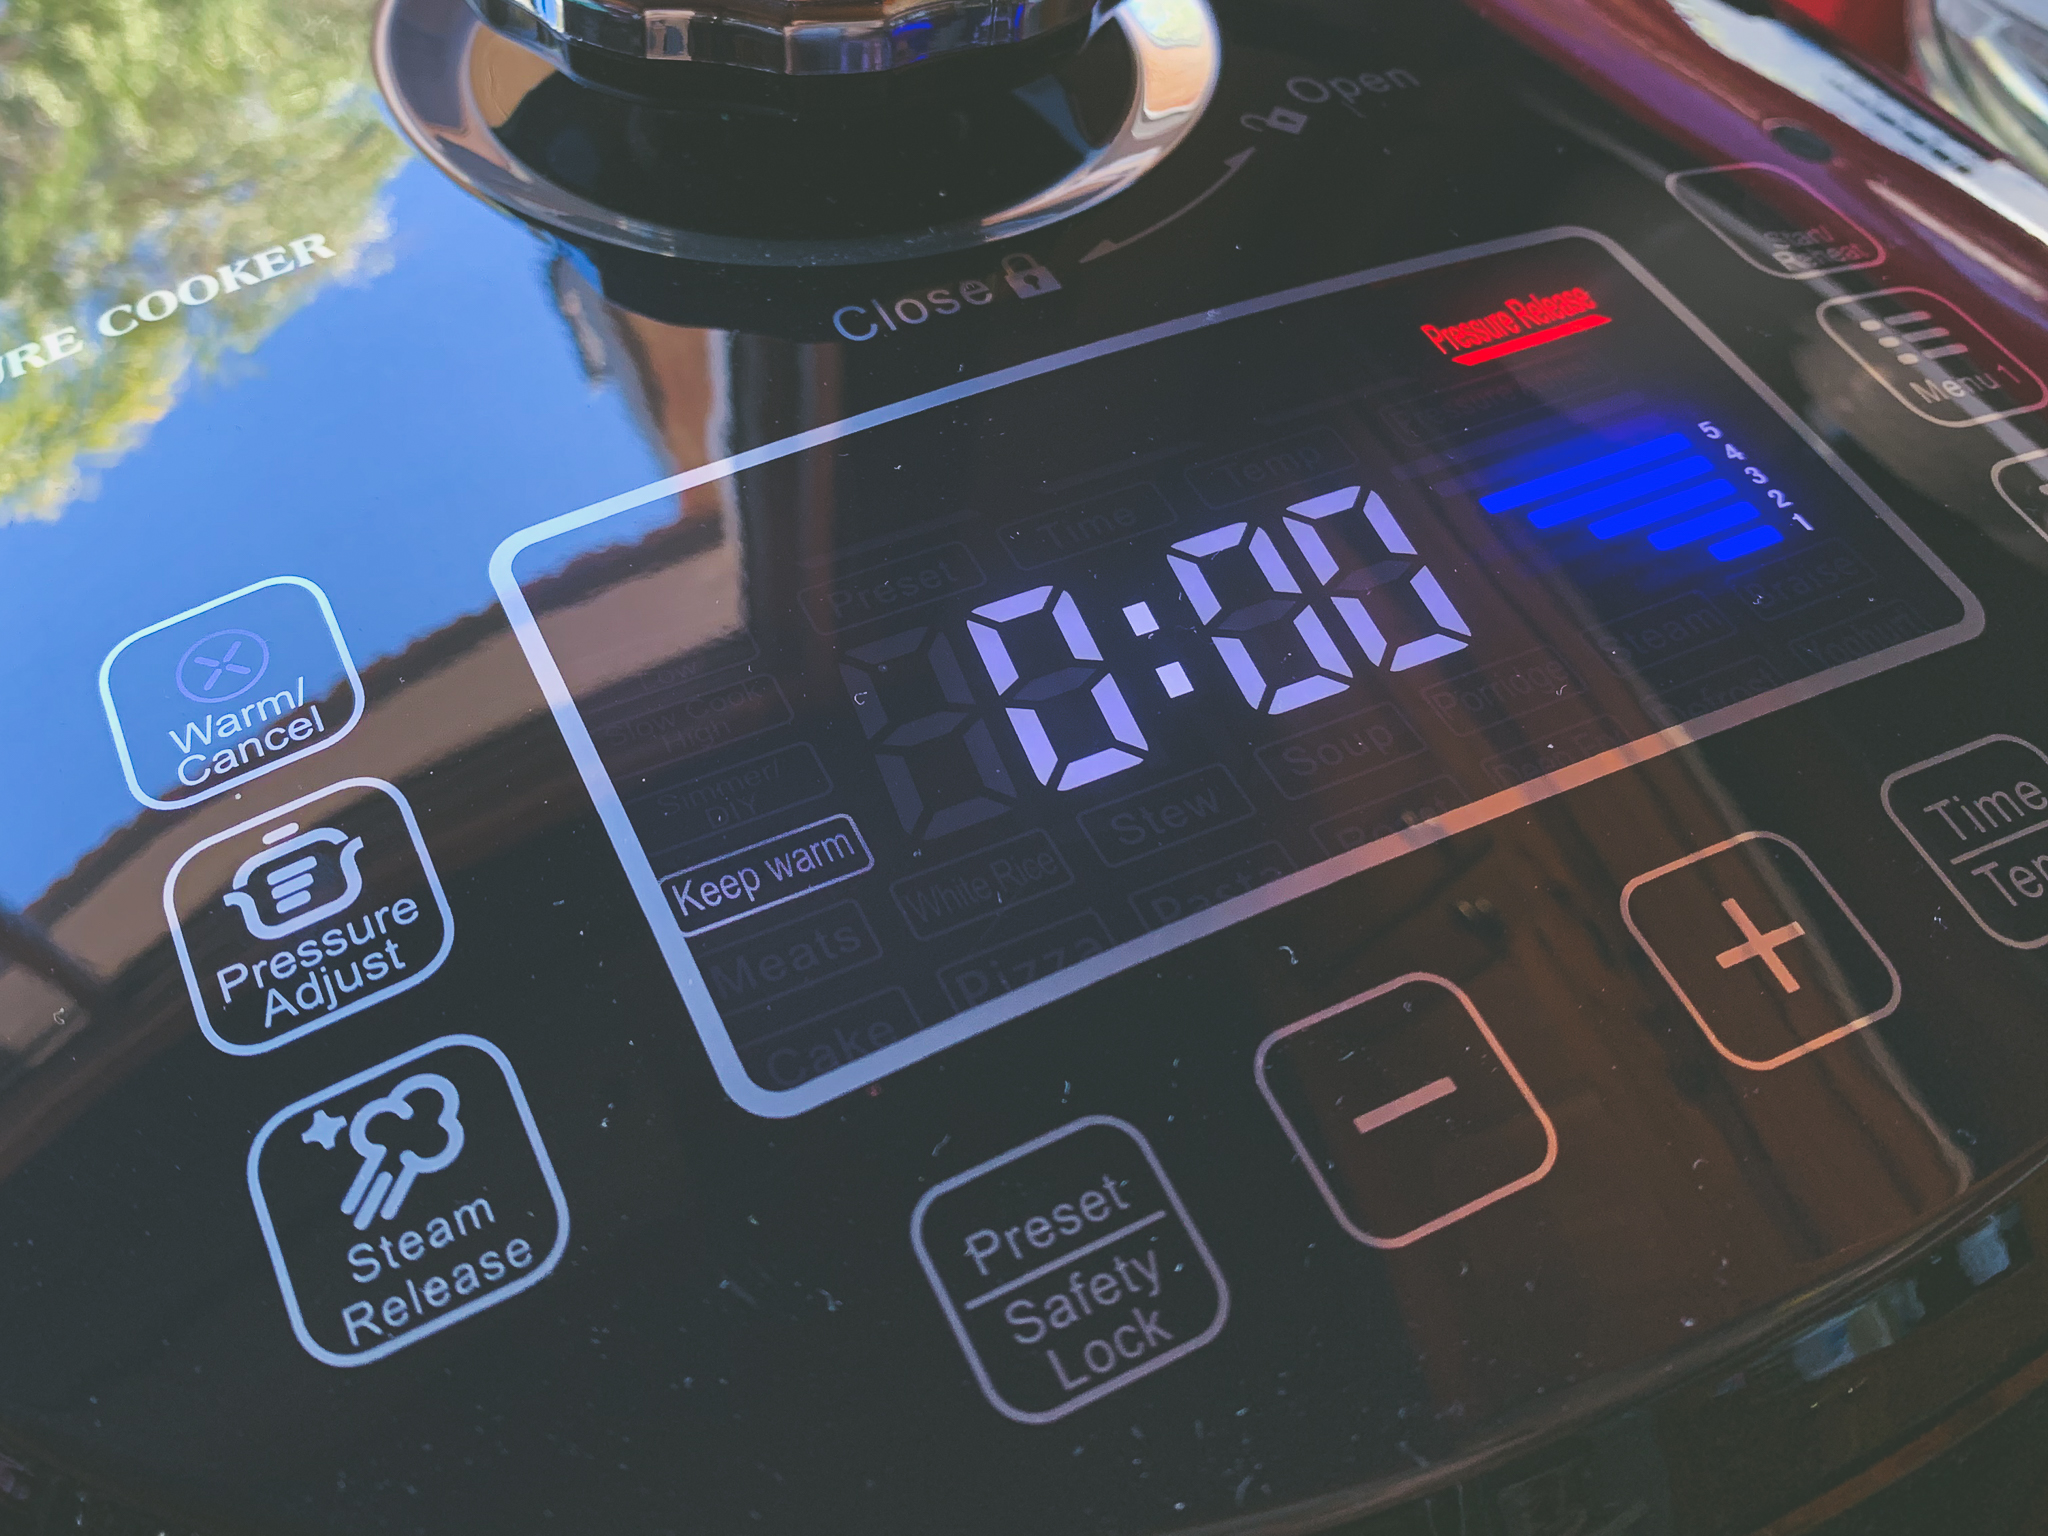
Once the natural release is completed, the "Pressure Release" display disappears. You can press the Warm/Cancel button at this point, and open the pressure cooker. When you press the button at the front, the lid doesn't spring up, it just unlocks, and slowly opens if you don't raise it yourself. Which is pretty nice.
At start, finish, and at each phase change, the Optimum Pressure-Cook Pro will talk at you. It’s pretty loud as well, so you can’t miss it. The test takes a total of about 15 minutes.