Create and Apply a Watermark with PicMonkey
The other day, a friend of mine asked me how to create a watermark for images she'll be sharing for her new business.
My first thought was to just use Photoshop or Lightroom, but these tools aren't necessarily the most accessible in terms of cost or ease of use. Particularly if your needs are simple or infrequent. But fortunately, there is an abundance of online image editing services to cater to all needs, and on a variety of platforms.
Today, I'll be showing you how to create a simple watermark, and apply it to an image, using PicMonkey in your web browser.
Note: I do not receive any benefits from PicMonkey for writing this post. It has been chosen because it's a free and accessible tool that allows people to complete this task with relative ease.
Create a Watermark
Step 1. Launch the PicMonkey editor
Browse to PicMonkey and at the top, select the Design option. For the dimensions, square will be fine.

Alternatively, shortcut this and just bookmark https://www.picmonkey.com/#edit which takes you right to the editor.
Step 2. Set a transparent background
The default view should allow you to set the background colour. For our purposes, tick the Transparent canvas checkbox. The main work area should now be filled with a grey and white grid. This is the conventional visual cue for transparency.

If you can't see this view, scroll to the Canvas Color item in that column and click on it.
Step 3. Overlay your logo
Click on the Overlays section represented by the butterfly in the left column, and click the Add your own button. This will launch a file dialog where you can select your logo, which will be loaded onto the canvas.

Note: It's preferable to use a logo with a transparent background. You can use one without, but the final result may not look as nice.
Step 4. Add your text
If you are adding text to your watermark, you can do this now using the Text section represented by the Tt in the left column. You may need to resize your logo accordingly by using the corner handles (these won't be visible in the final result), and reposition it by clicking and dragging in the centre of the logo.

Step 5. Crop your watermark to size
Using the Basic Edits section represented by the first icon in the left column, click on Crop. Your canvas will now be tinted grey with a clear box in the middle with grey corner handles. Click and drag the corner handles so that it's roughly the size of the content. Leave some space around the sides.
Click Apply, and the canvas will now be the size you selected.

Step 6. Apply a semi-opaque background
You can pretty much stop here, but to ensure that your branding is visible on a variety of images, you can add a semi-opaque background behind the logo.
Click on Overlays again (the butterfly) then look for Geometric. Clicking on it will show you a list of black shapes. Click on the rectangle. In the options pane, click on the box next to Color 2 which is the background colour, and choose white. For a shortcut, type ffffff (6 f's) in the text box.
Now, use the white corner handles of the white rectangle and resize it so that it is bigger than your watermark. I know you can't see your branding anymore, that's okay, just make sure you can't see any grey and white grid. If your work area is a little tight, you can use the zoom slider at the bottom to zoom out so you have space to drag the handles.
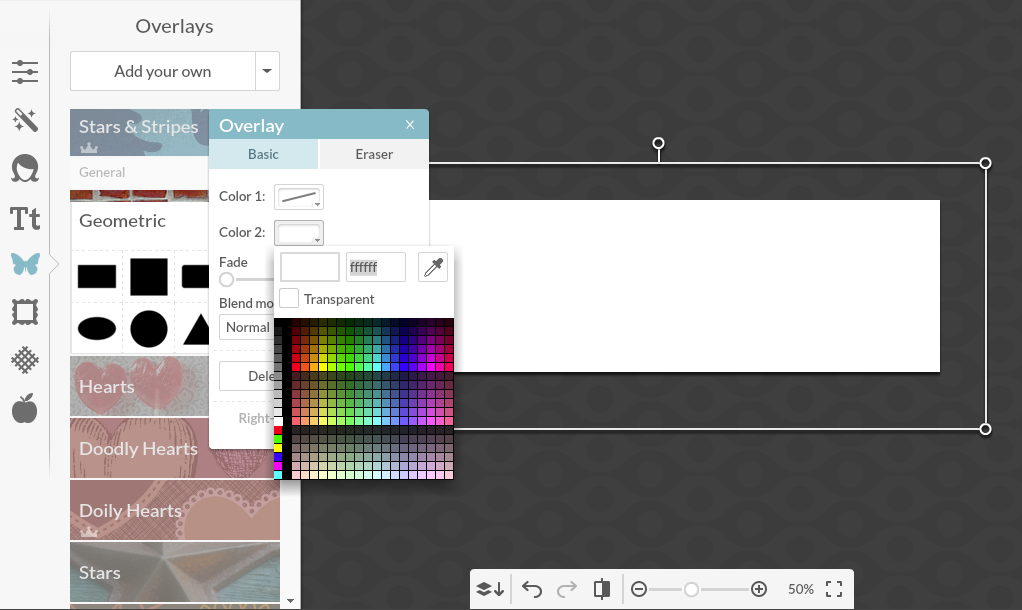
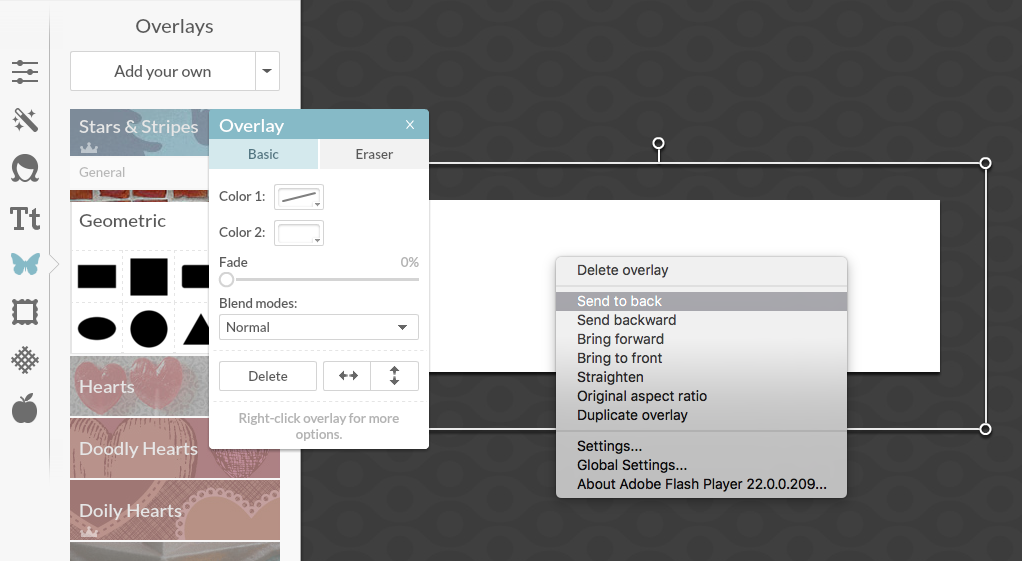
Then right click on the rectangle and click Send to Back. Your branding should be visible again.
In the options pane, drag the Fade slider to show some of the background. I've set it to 50% but you can adjust to your liking. The white rectangle should now show a lighter grey and white grid.

Step 7. Save your watermark
Click on the Save button at the top. Name your watermark, make sure the file type is .png, and click Save to my computer.

Your watermark is now complete. You can save this image to your computer and apply it to your photos at will.
Apply a Watermark to an Image
Now that you have a watermark, you can apply it to your photos. There are apps you can use to do this in batches, but you can also apply this to your photos individually using PicMonkey.
Step 1. Load your photo
Back in the editor, click on Open at the top, then and select the photo you want to use.
Step 2. Overlay your watermark
This is looking familiar.
Click on the Overlays section (the butterfly), and click Add your own. This will launch a file dialog where you can select the watermark you just created.
Resize and position it accordingly. If you added a semi-opaque background, you should see the effect off that now.

Step 3. Save your watermarked photo
That's it. Save your image and you're done.
Examples
The first example is one created with this guide, and the second is without additional text, and using a circular semi-opaque background instead of a rectangular one. You can experiment with this to get the effect you want.


Notes
Cup of tea photo from Pixabay.
I found that Safari had a tendency to crash when the image was being saved. The image would save fine, but the browser had to be restarted.