Replace the Grommet/Eyelet on a Bag
Our toddler has been learning by leaps and bounds lately. She’s currently in the super helpful phase, and getting into routines. When we’re heading out, she’ll make sure we’ve all got our phones, bags, keys, and shoes, and fetches them for us if she thinks we’ve left them behind. It’s very cute.
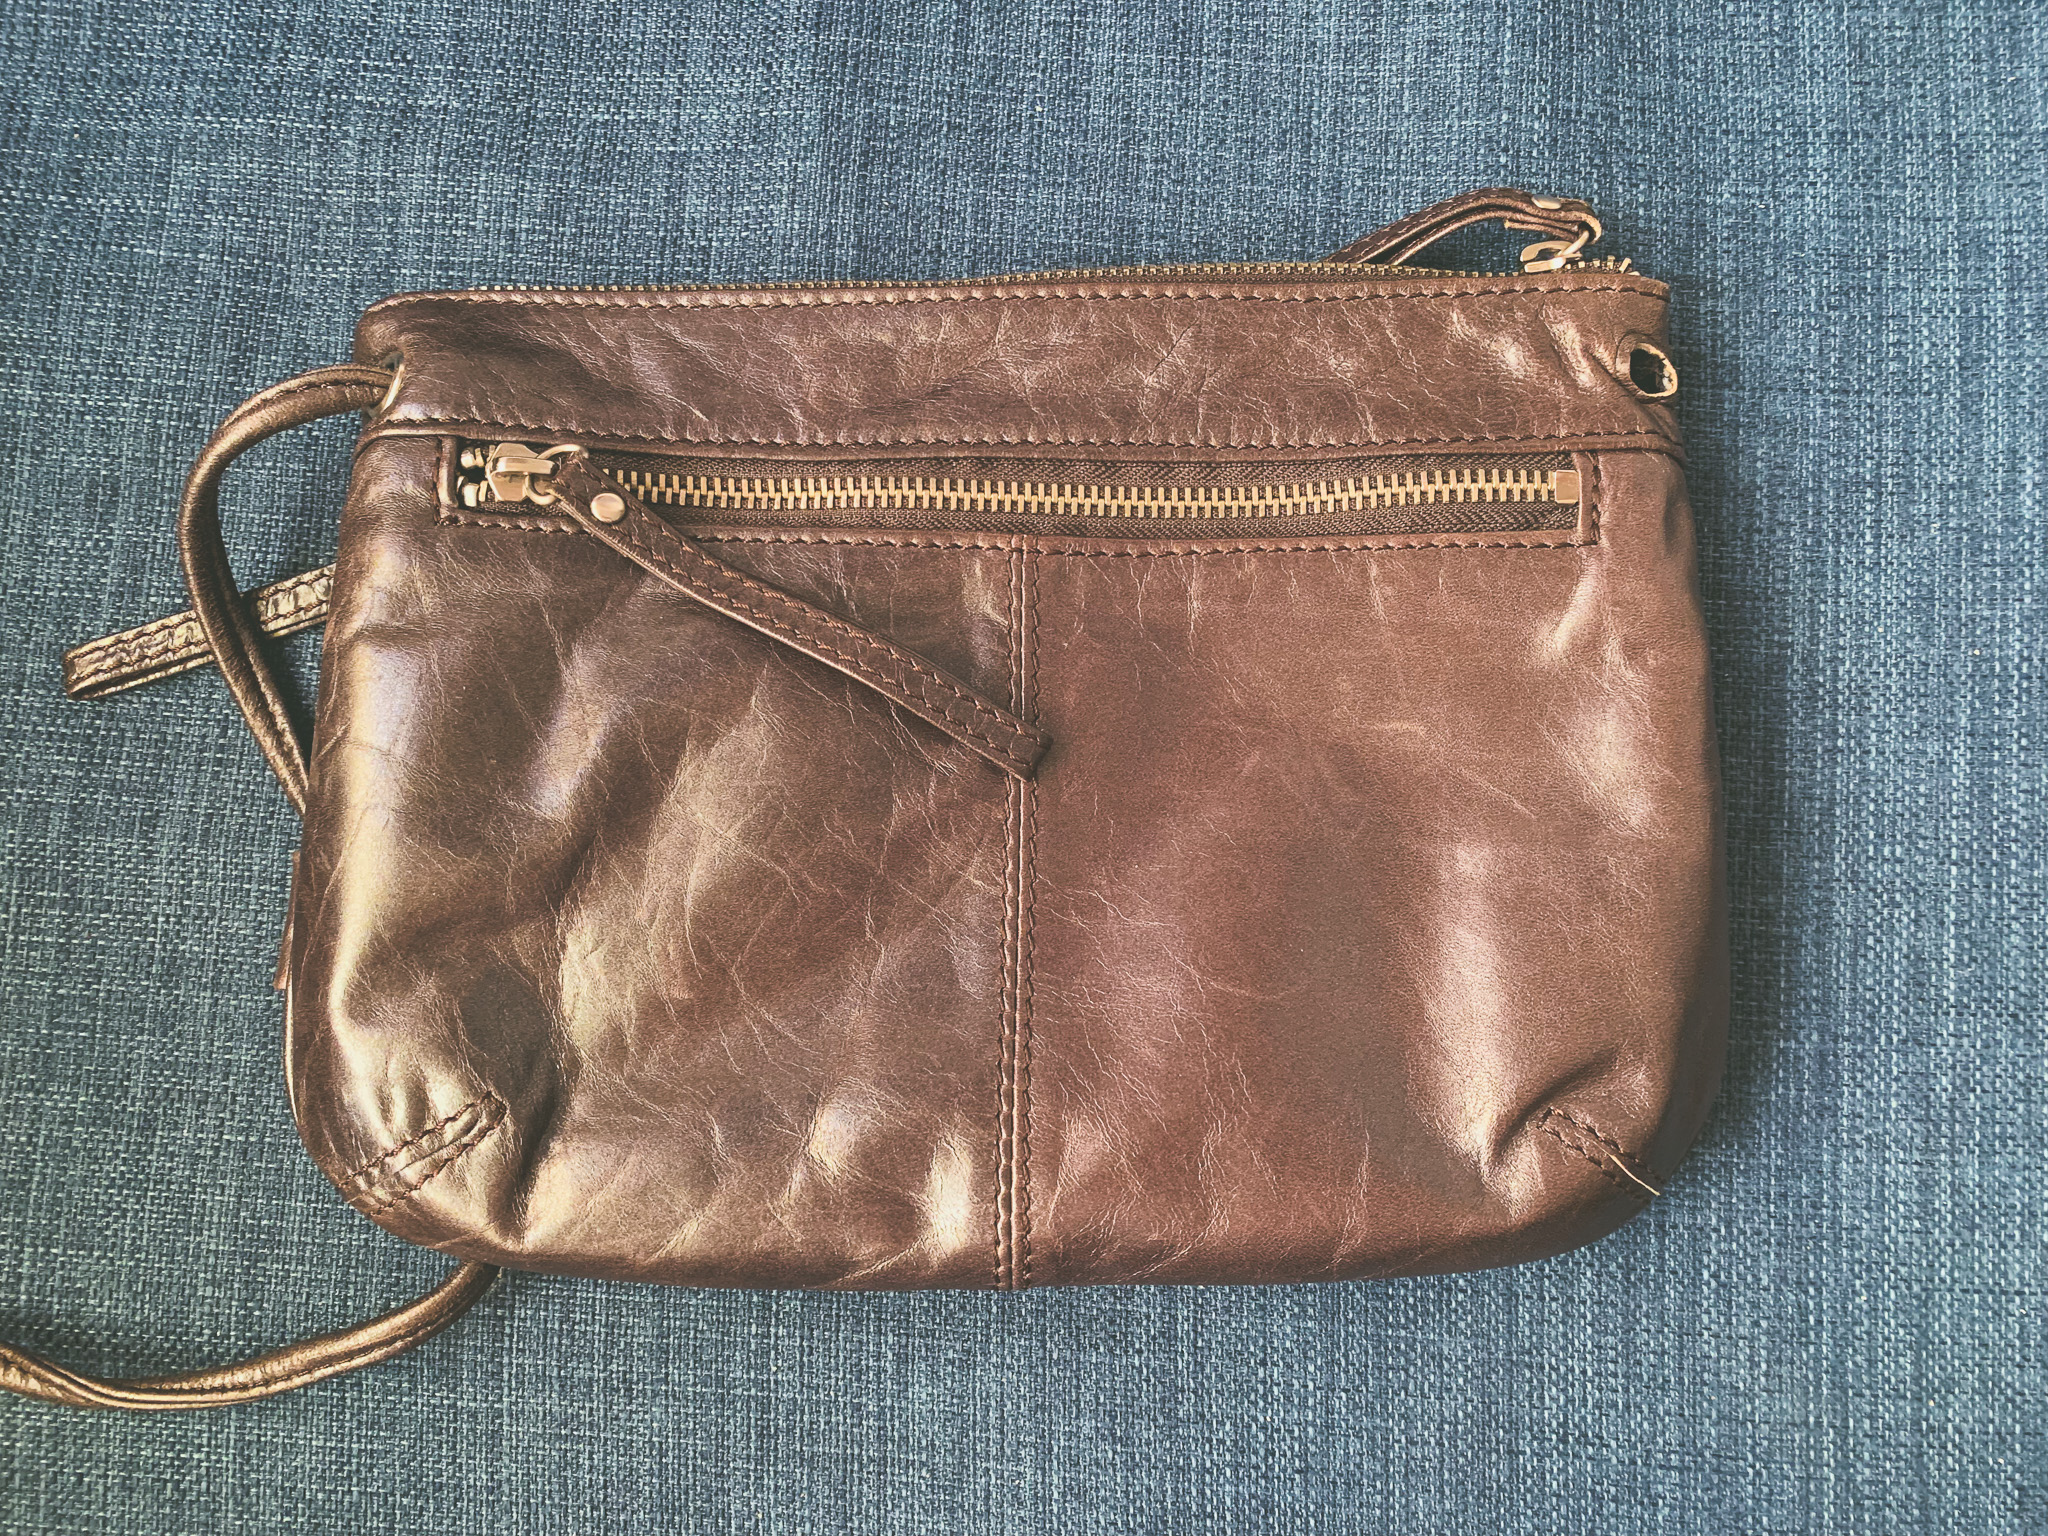
She’ll also roleplay the routine on her own, pretending to be us and collecting the things for herself. Some of our bags are more cumbersome than others, so when she roleplays, it’ll often be with one of my smaller bags which will be dragged along the floor and caught on things on the way through.
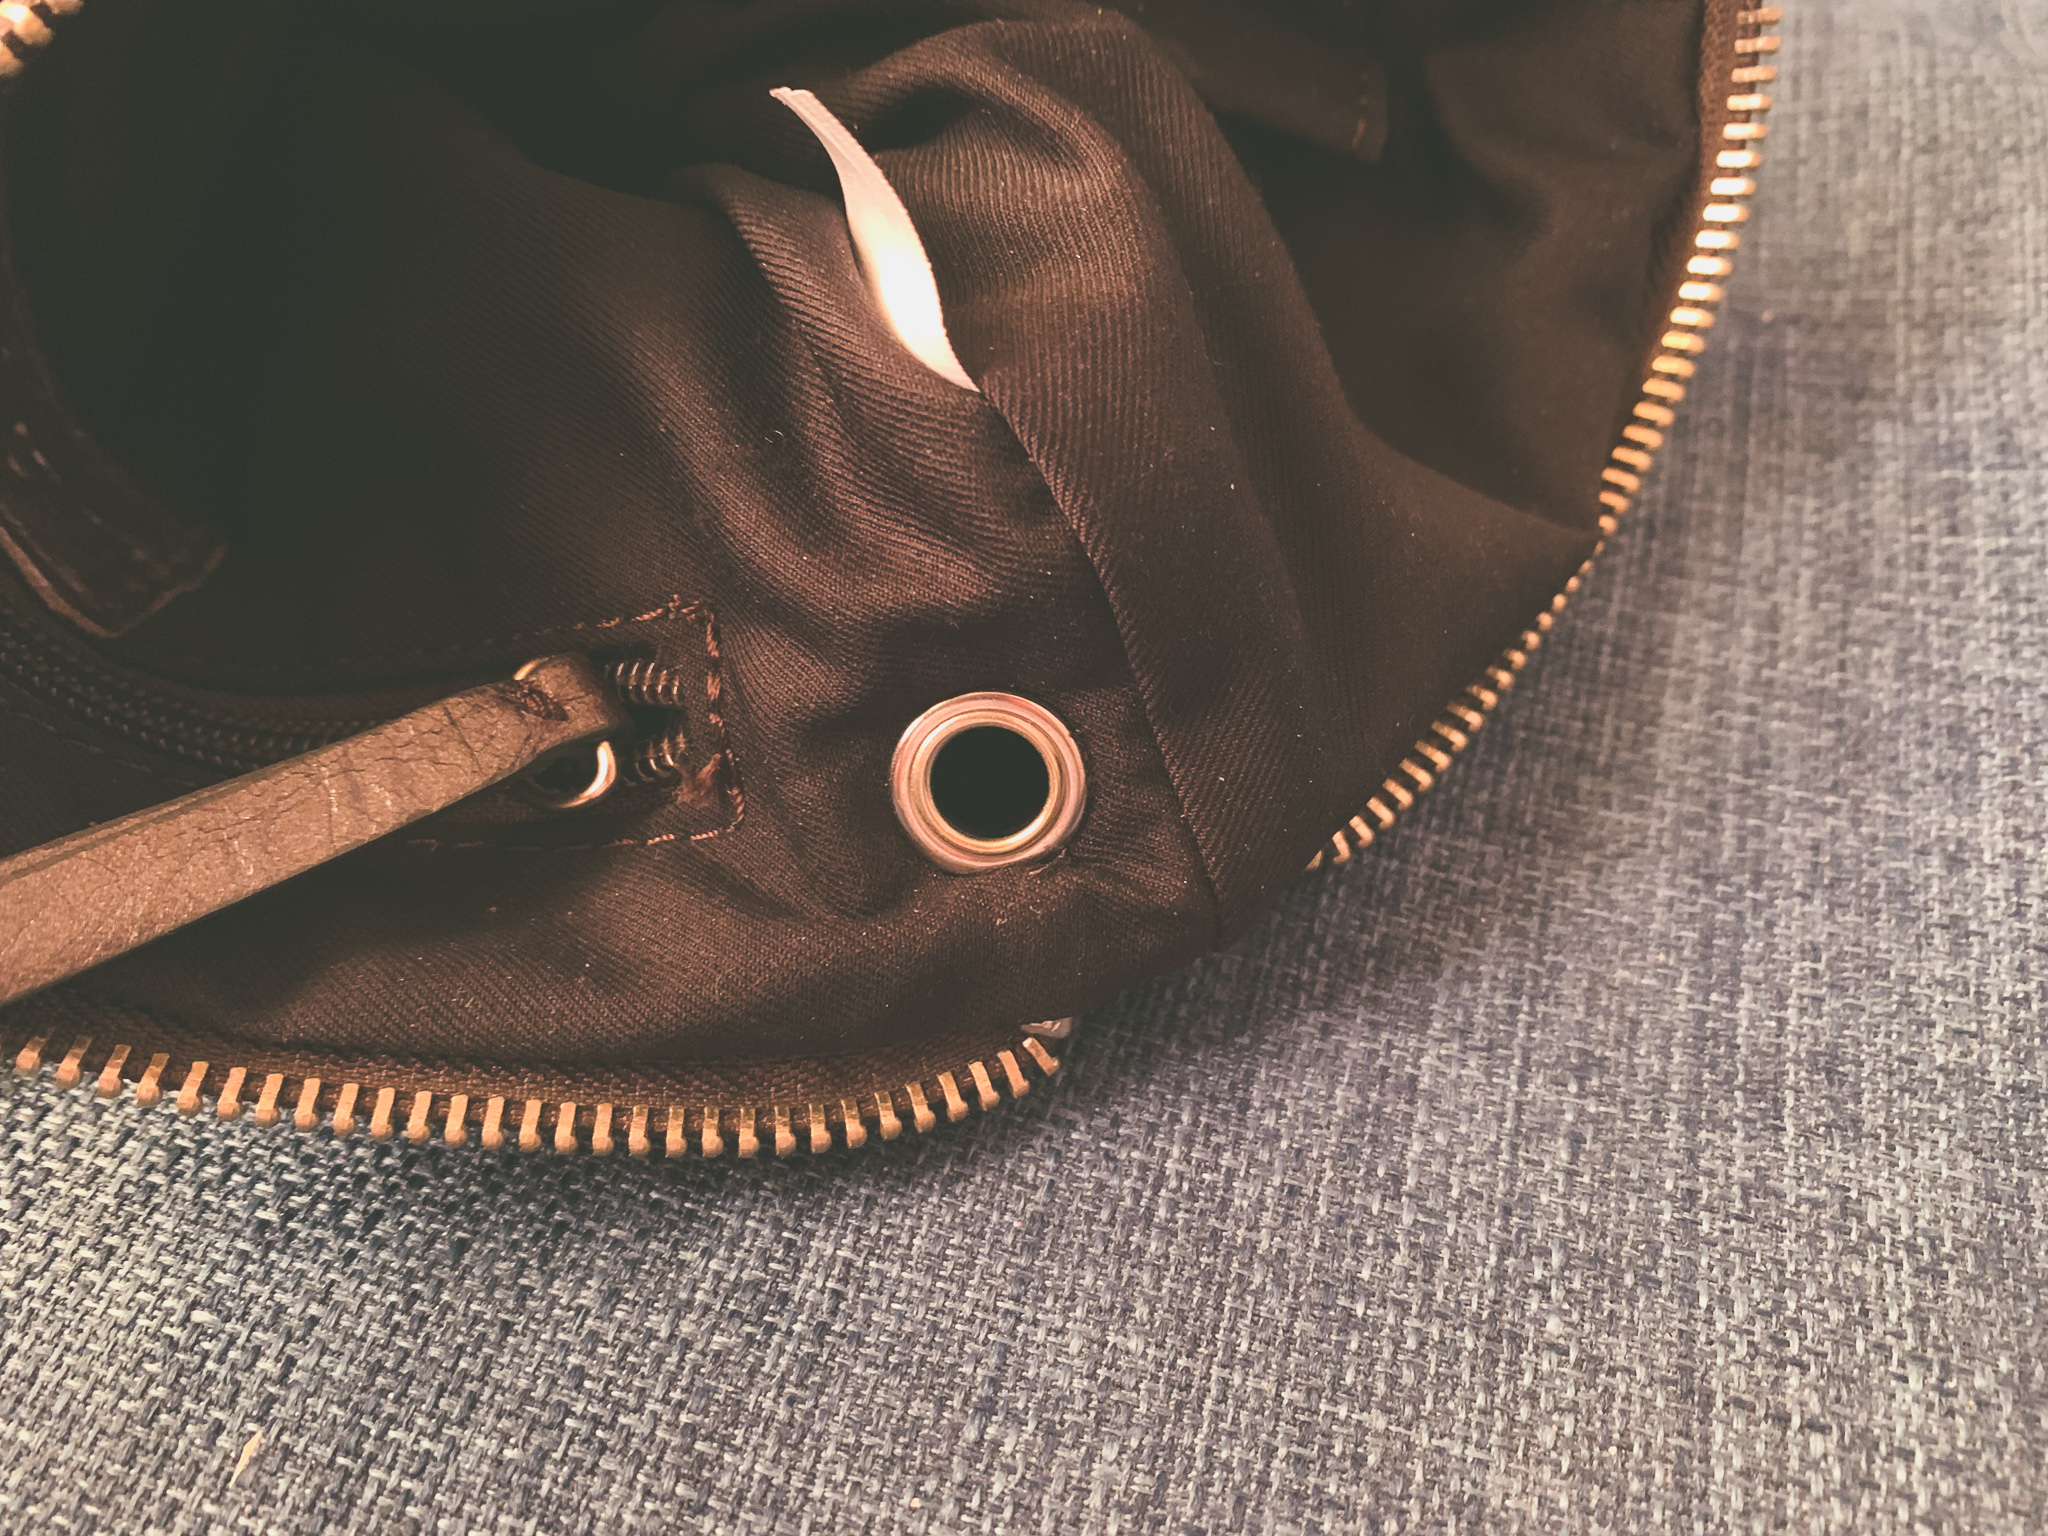
One day, the bag had enough of this, and a grommet that held one of the straps popped out.
I took the bag to a trusted cobbler and while they said it would only cost AUD$5-10 to repair, they didn’t have any grommets the right size so I’d have to source those myself. For a little more than that, I could pick up a pack of grommets (you can’t buy them in singles anyway) and the application tool. So I did.
Materials
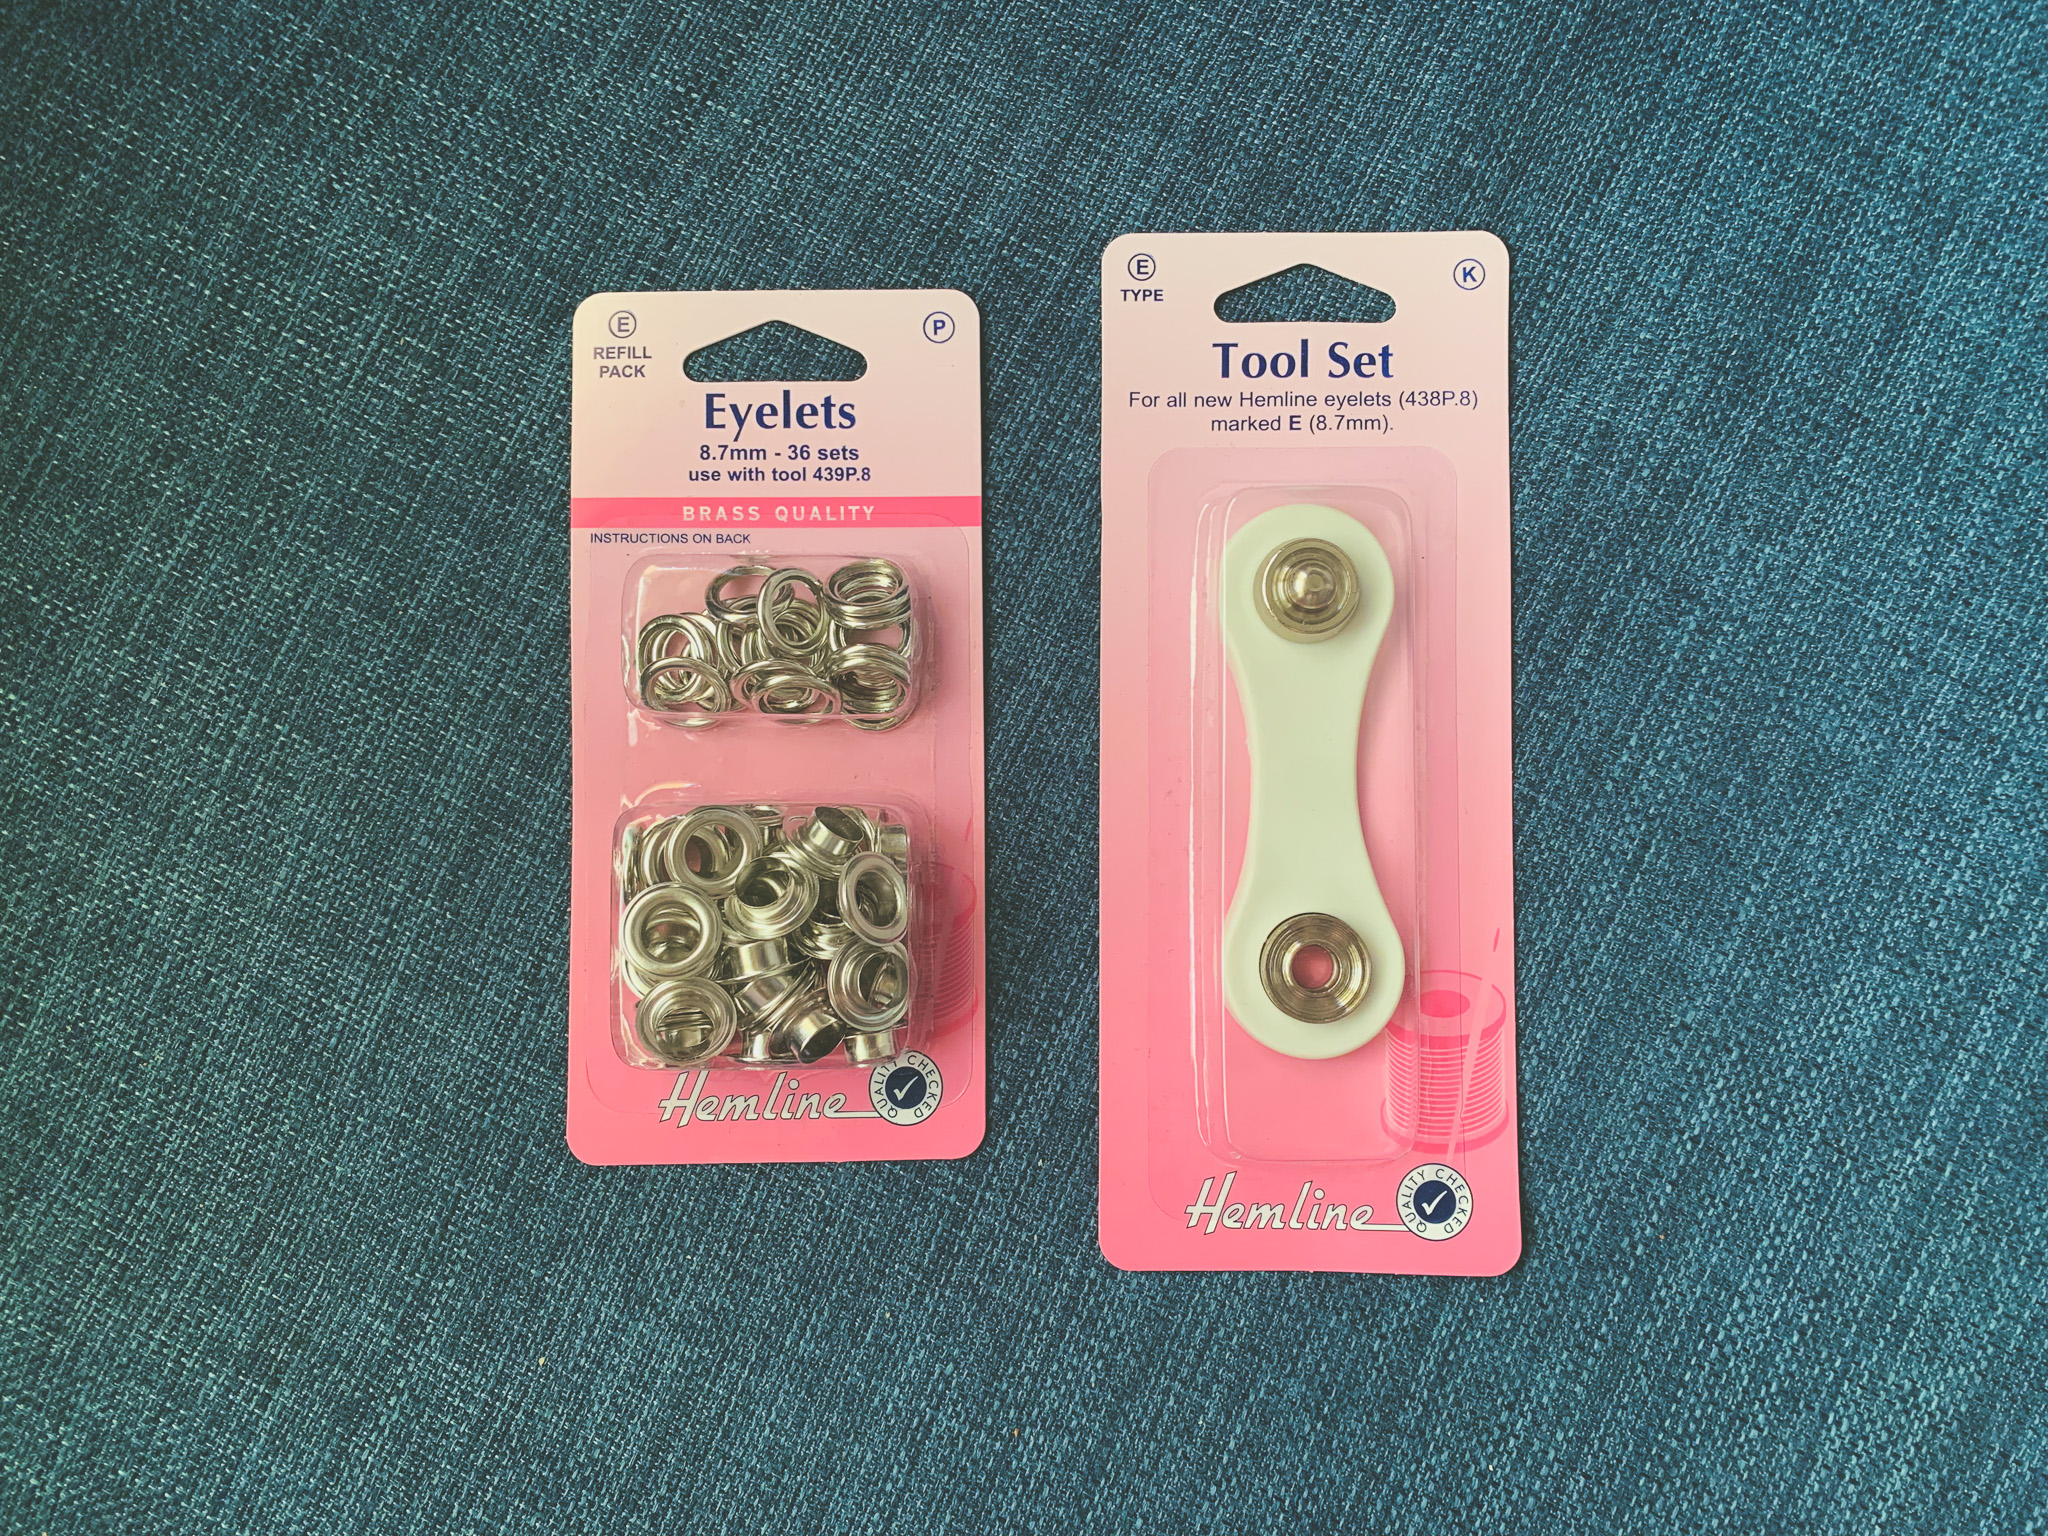
- A packet of grommets/eyelets the right diameter (or close)
- The application tool for the required grommet size
- A hammer
Application
The back of the pack comes with a handy set of instructions. But just in case yours does not…
Your toolkit will come with two parts. The bottom part curves inwards, and the top part protrudes outwards and has a convenient handle.
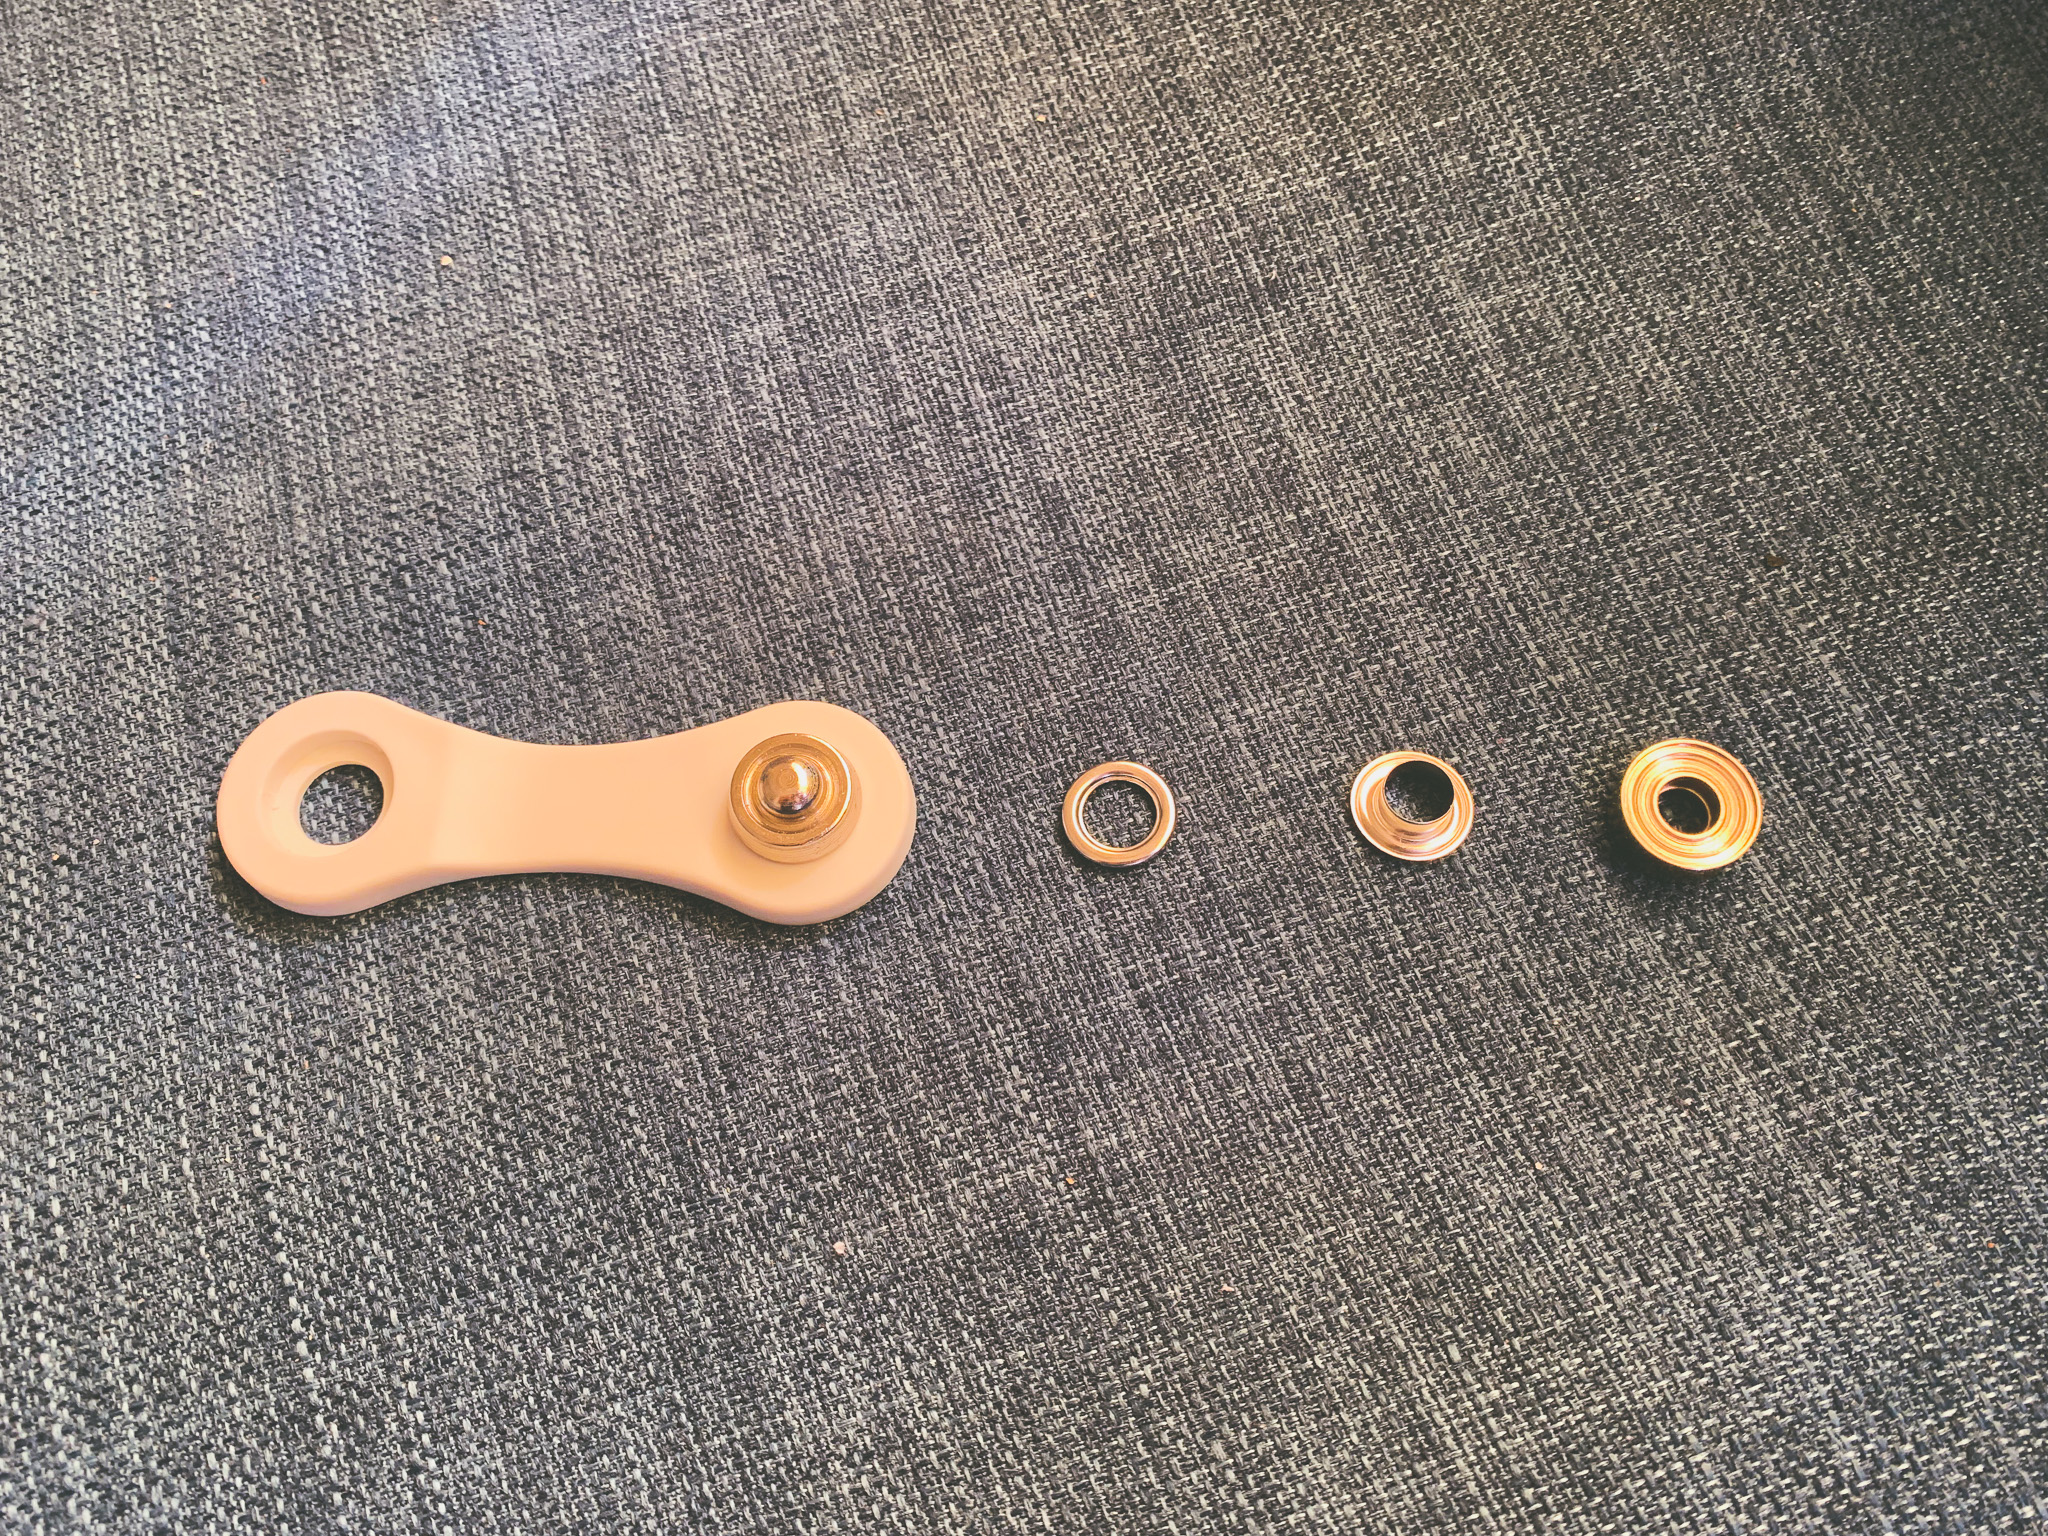
Take one of your grommet bases (tall part) and set it into the bottom of the tool part.

Place the hole with the missing grommet outer fabric facing downwards over the grommet shank/tube (no accurate terminology here, sorry) and line it up.There wasn’t too much stretch on mine so it fit quite well, but if yours has stretched out a bit, take some time to shift it back into place, or you could use glue (appropriate for your materials) to fix it in place to the grommet beforehand. Make sure you clean up any glue that may end up visible outside the grommet edges before it dries.
Place the washer (flat part) over the top, sandwiching your material between the two grommet halves.Again, use glue if necessary to fix the materials in place.
Place the top of the application tool (with the handle) on top of the grommet sandwich and position so that all parts are properly nested.
Hammer.This required a little more force than I expected, and several strikes to set in place.Make sure you have an appropriate workspace. I put a yoga mat over a wooden cutting board over a towel folded over a couple times to protect the floor I was working on.
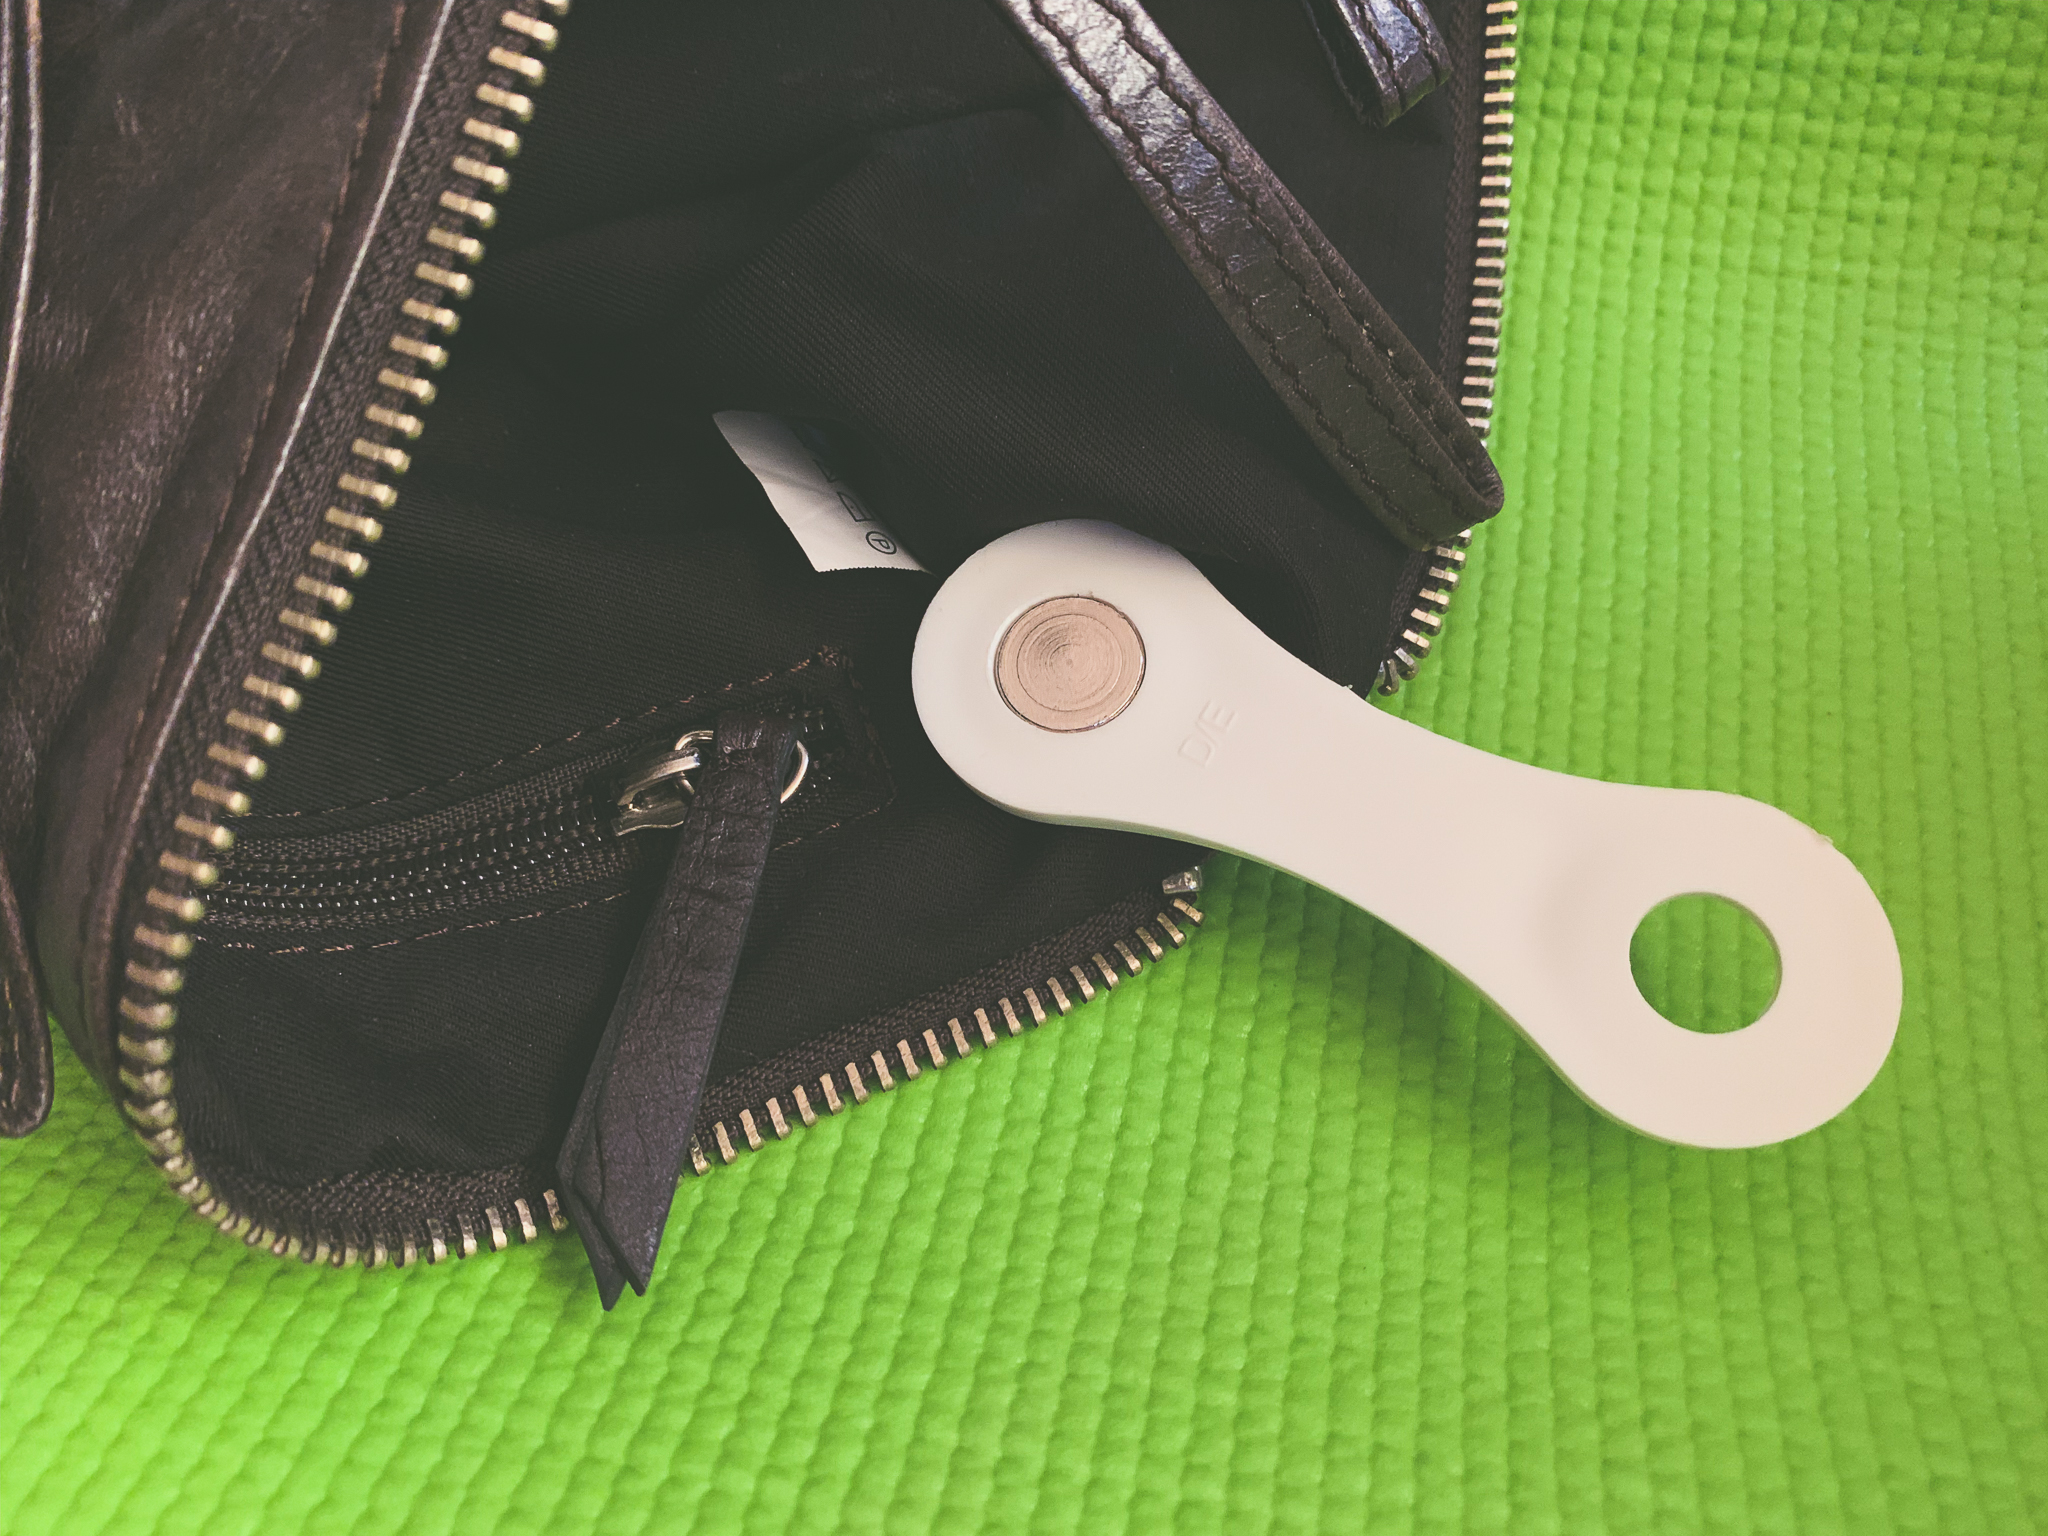
After a few firm strikes, you can check on your progress by carefully testing the edges of the grommet to see if the materials shift. If they do, shift it back into position and give it a few more strikes. Repeat until the grommet is satisfactorily sandwiched.
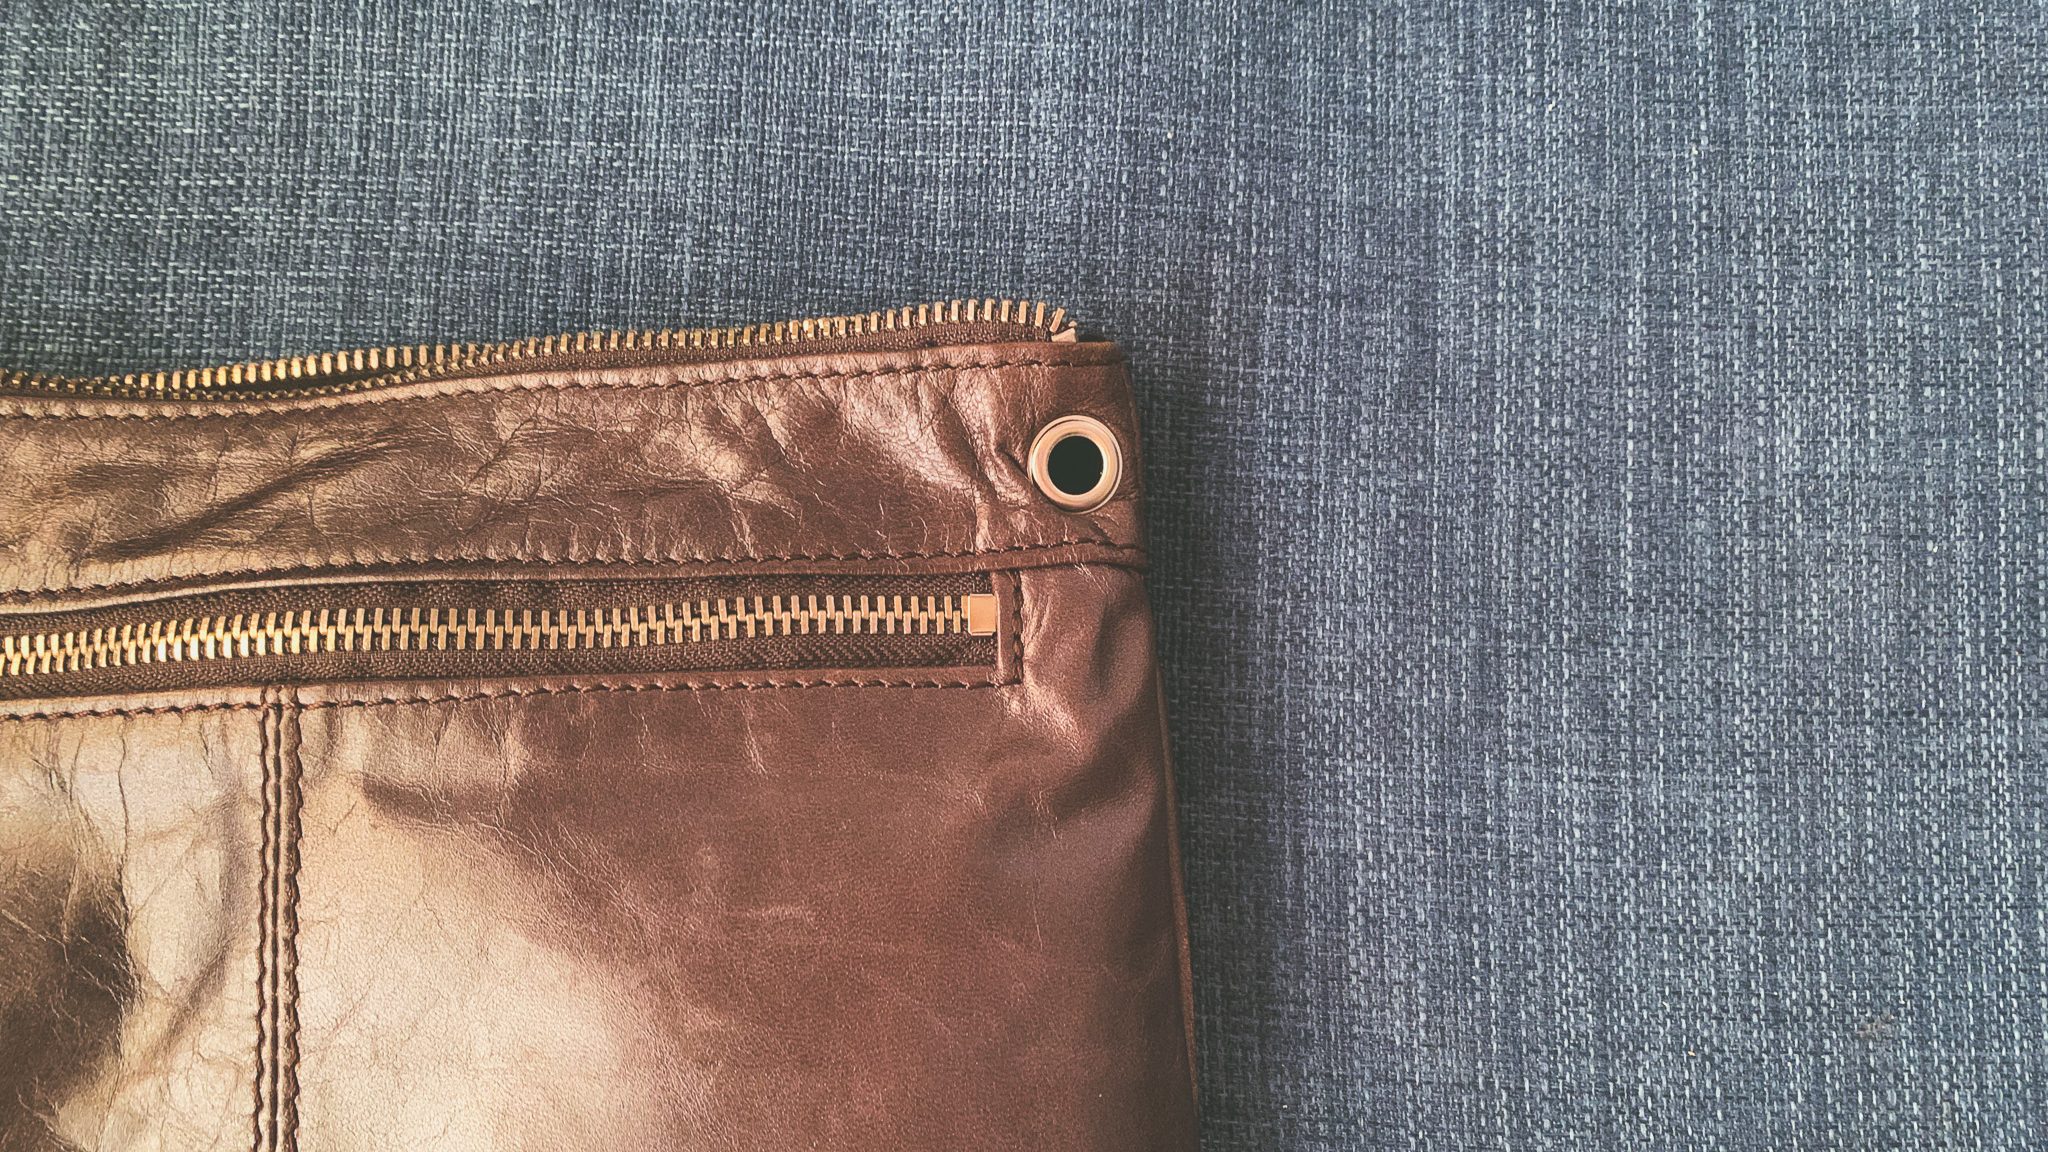
The total repair took about 10 minutes including the time it took faffing around making sure all the sandwich layers were lined up. Bit longer if you need to use glue.
And should the other grommet go[1] then I’m all sorted to do this again.
[1] No doubt it will if the munchkin keeps tugging at my bag.