Nursing Conversion for Regular Bras and Bralettes
I’m not even sure this warrants a post, it’s just that simple. [ad voice] You too can have your own custom nursing bras in 5 minutes!
For those in the market for nursing bras, your options are cheap and cheerful sports bra-looking ones, ridiculously expensive sports bra-looking ones, or the even more ridiculously expensive attractive-looking ones. The former are very comfortable, but can limit what you are able to wear over the top. As if we’re not limited enough as it is for affordable, fashionable and discreet nursing-friendly clothing. Not wanting to spring for the last category, I picked up a few regular bras, bra strap elastic, and some nursing clasps (from your local sewing shop, eBay or AliExpress) and went about converting them.
I admit, the one pictured still looks sports bra-like, but it’s a bralette with this cool strappy thing going on at the back.
Step 1: Release the Straps
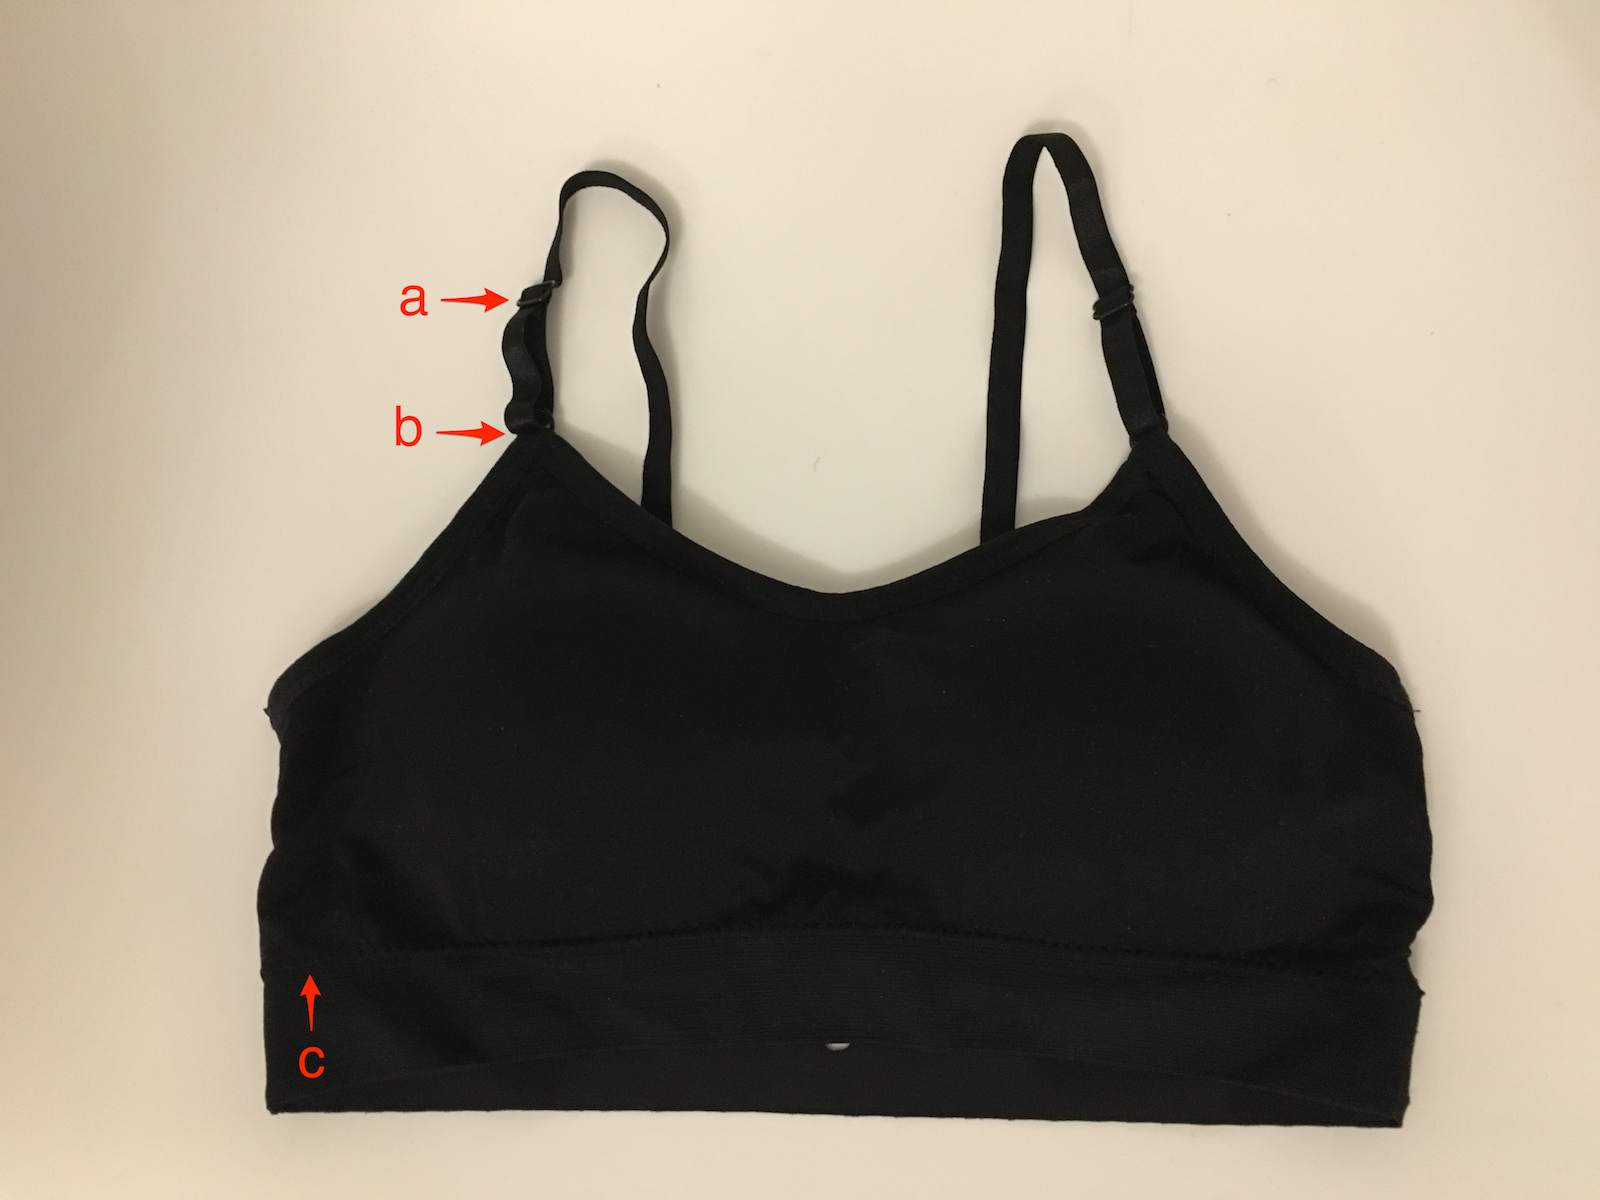
The bra strap will be stitched or otherwise attached near the slider at (a) which allows the strap length to be adjusted. Unpick the stitches, or otherwise rip the anchoring to release the strap. Unthread the strap end from the slider, and the ring at (b), but keep the rest of the strap on the slider.
Step 2: Remove the O Ring
Unpick the stitches that hold the O ring to the cup at (b). Set aside the ring, as this will be replaced with the clasp.
Step 3: Attach the Clasp
The clasp consists of two parts. The back part which attaches to the strap (the hook), and the front part which replaces the ring on the cup.
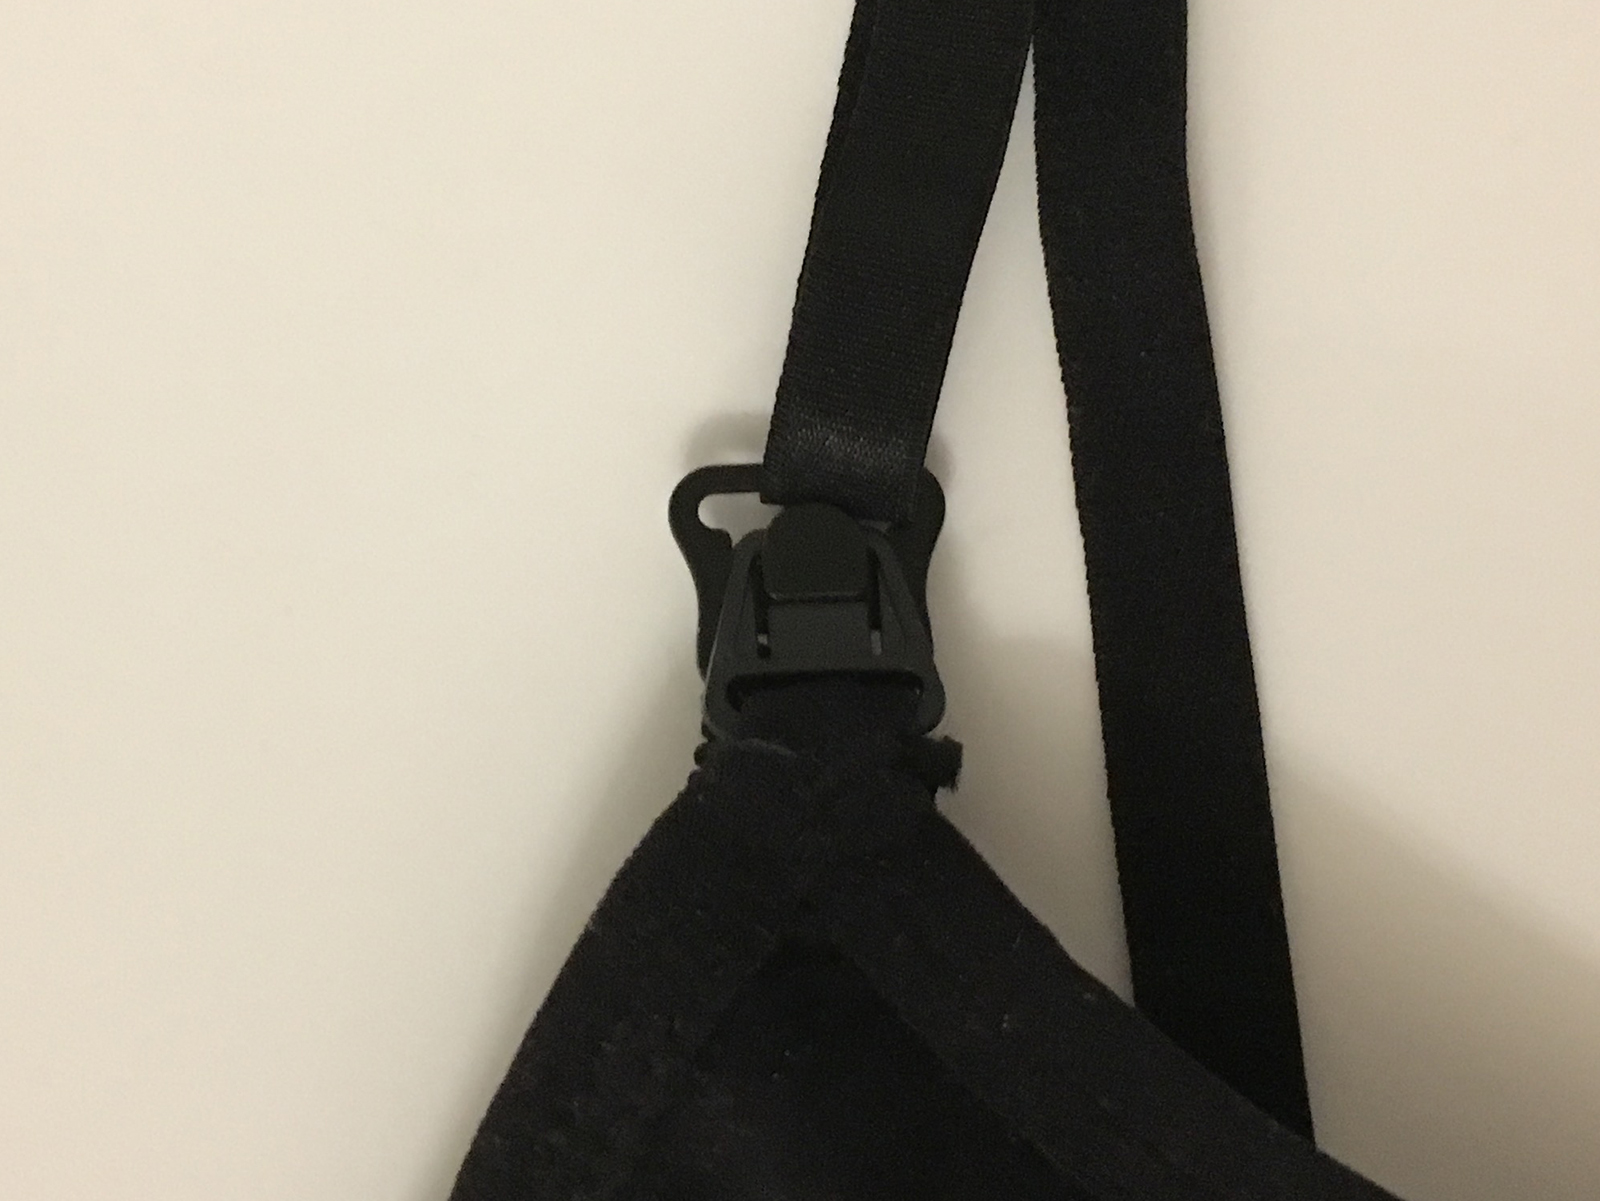
Thread the strap end you just released onto the back part of the clasp, from front to back, and back through the rear of the slider behind the existing strap. Fold the end down and stitch across it, replacing the fastening you unpicked in Step 1. Use a narrow and short zig-zag stitch if using a sewing machine, or stitch by hand going back and forth a few times to reinforce it.
Thread the end of the cup where the O ring was onto the front part of the clasp. Fold the end down back onto the cup and stitch across to fasten.
Step 4: Anchor the Strap
At this stage, if you unclasp the bra, you will likely lose the strap over your shoulder. The bottom of the back part of the clasp has another slider so that you can anchor the strap to the bra for unclasping.
Measure a length of bra strap elastic that is a couple centimetres longer than the distance between the clasp and the bottom of the cup at point (c). You want (c) to be close to the side and bottom of the cup so that it can sit flat, but not so close to the side that you can see it sticking out behind the cup when the clasp is fastened. Pin the elastic, and fit the bra if you want to be sure.
Thread one end of the elastic through the bottom slider, fold and stitch it down. Stitch the other end to the point you marked at (c). In this case, (c) was at the seam between the cup and the band.
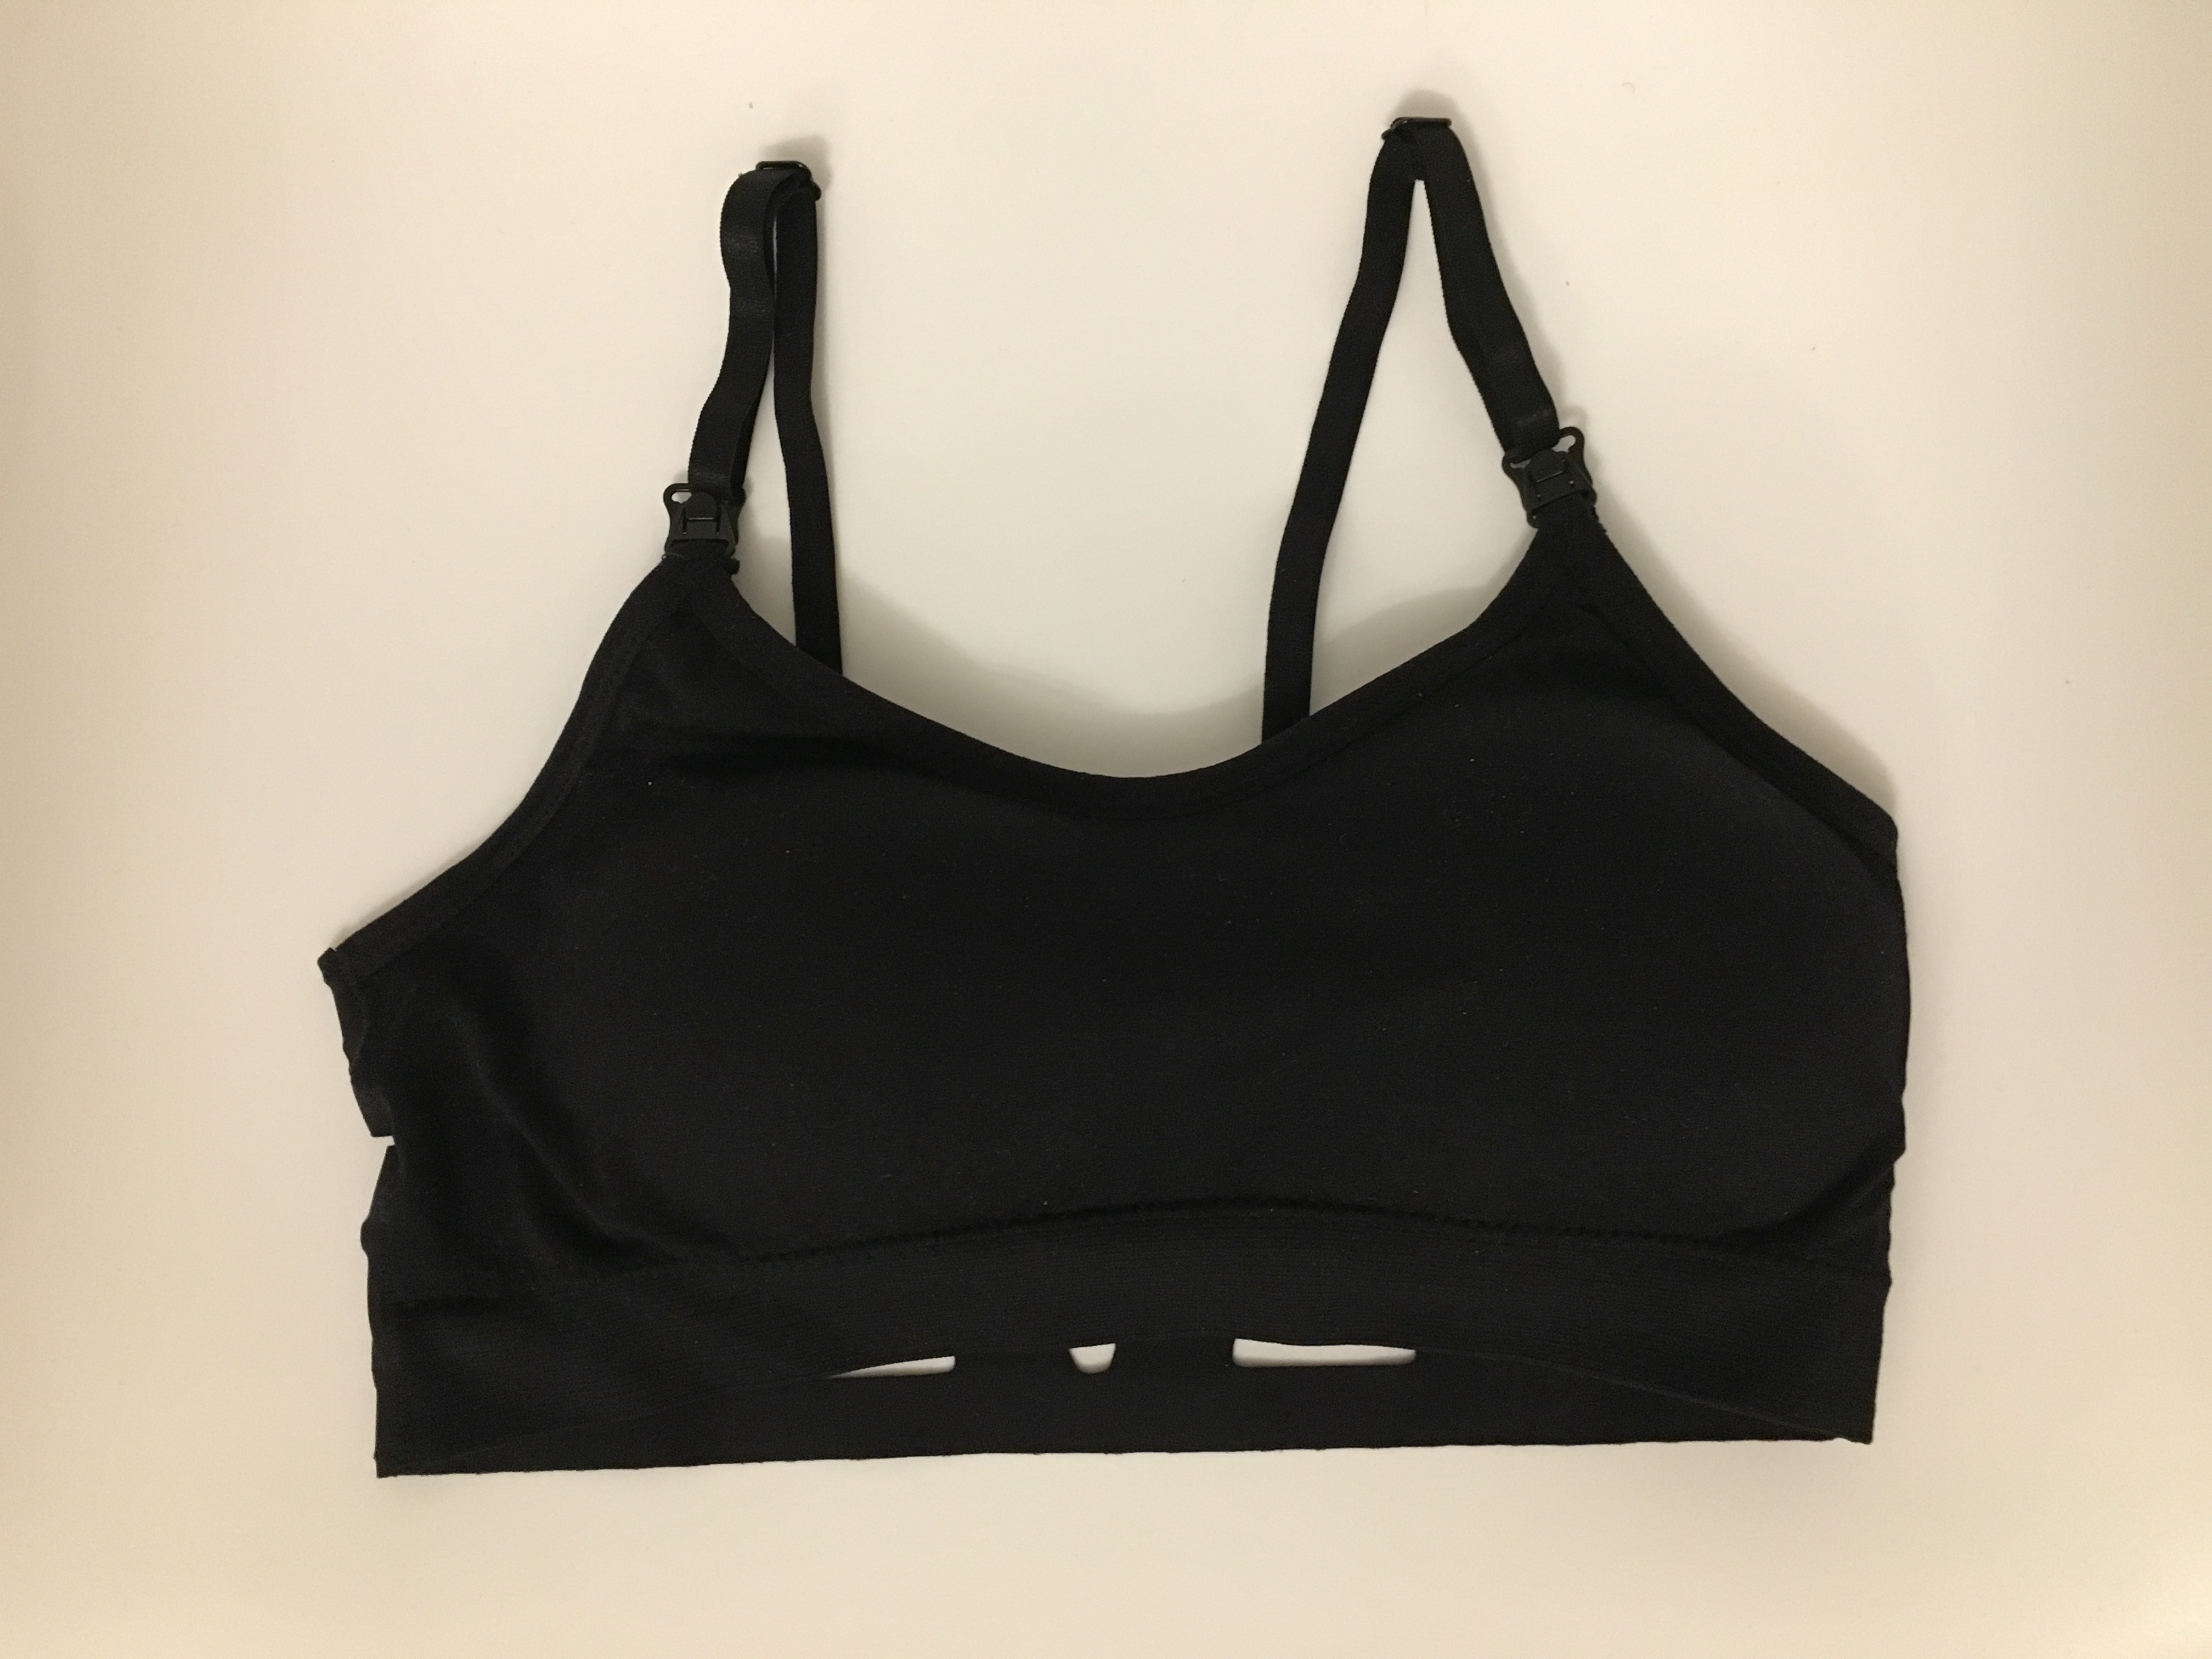
Et voila, custom nursing bra.